Integrate email events with Resend webhooks

Resend webhooks can be used to build functionality into your application based on changes in the email status. In this guide, you will learn:
- What webhook events are offered by Resend.
- How to set up Inngest to receive Resend webhook events.
- How to define Inngest functions in your application using Resend events.
- How to build a dynamic drip marketing campaign which responds to a user's behavior.
To follow this guide, you need a Resend and Inngest accounts and have Inngest set up in your codebase.
Resend webhooks
Resend uses webhooks to push real-time notifications to your application about the emails you're sending. It offers the following event types:
email.sent- the API request was successful and Resend will attempt to deliver the message to the recipient's mail server.email.bounced- the recipient's mail server permanently rejected the email.email.delivery_delayed- the email couldn't be delivered to the recipient's mail server for example, because the recipient's inbox is full, or when the receiving email server experiences a transient issue.email.delivered- Resend successfully delivered the email to the recipient's mail server.email.complained- the recipient marked the delivered email as spam.email.opened- the recipient's opened the email.email.clicked- the recipient's clicked on an email link.
These events can be used to build responsive behavior based on changes in the email status. For example, you could use these events in scenarios such as:
- If an email bounced, remove the address from the mailing list or flag it in the database.
- Create a dynamic marketing drip campaign based on the recipient behavior.
- Build incident or retention report for your email campaigns.
Building with Resend webhooks
You can manage webhook events directly in your backend through an endpoint or you could use a tool like Inngest which ensures reliable execution of functions in your codebase. Inngest comes with functionalities such as:
- a built-in queue to execute longer-running functions reliably
- Controlling concurrency to handle spikes without overwhelming your API or database.
- Executing multiple functions from a single event (fan-out jobs).
- Implementing delayed code execution after a specified period.
- Debouncing events to minimize duplicate processing.
In short, using Inngest makes your application more resilient, scalable, and easier to recover from an incident.
Receiving Resend webhook events in Inngest
Let's now connect Resend with Inngest.
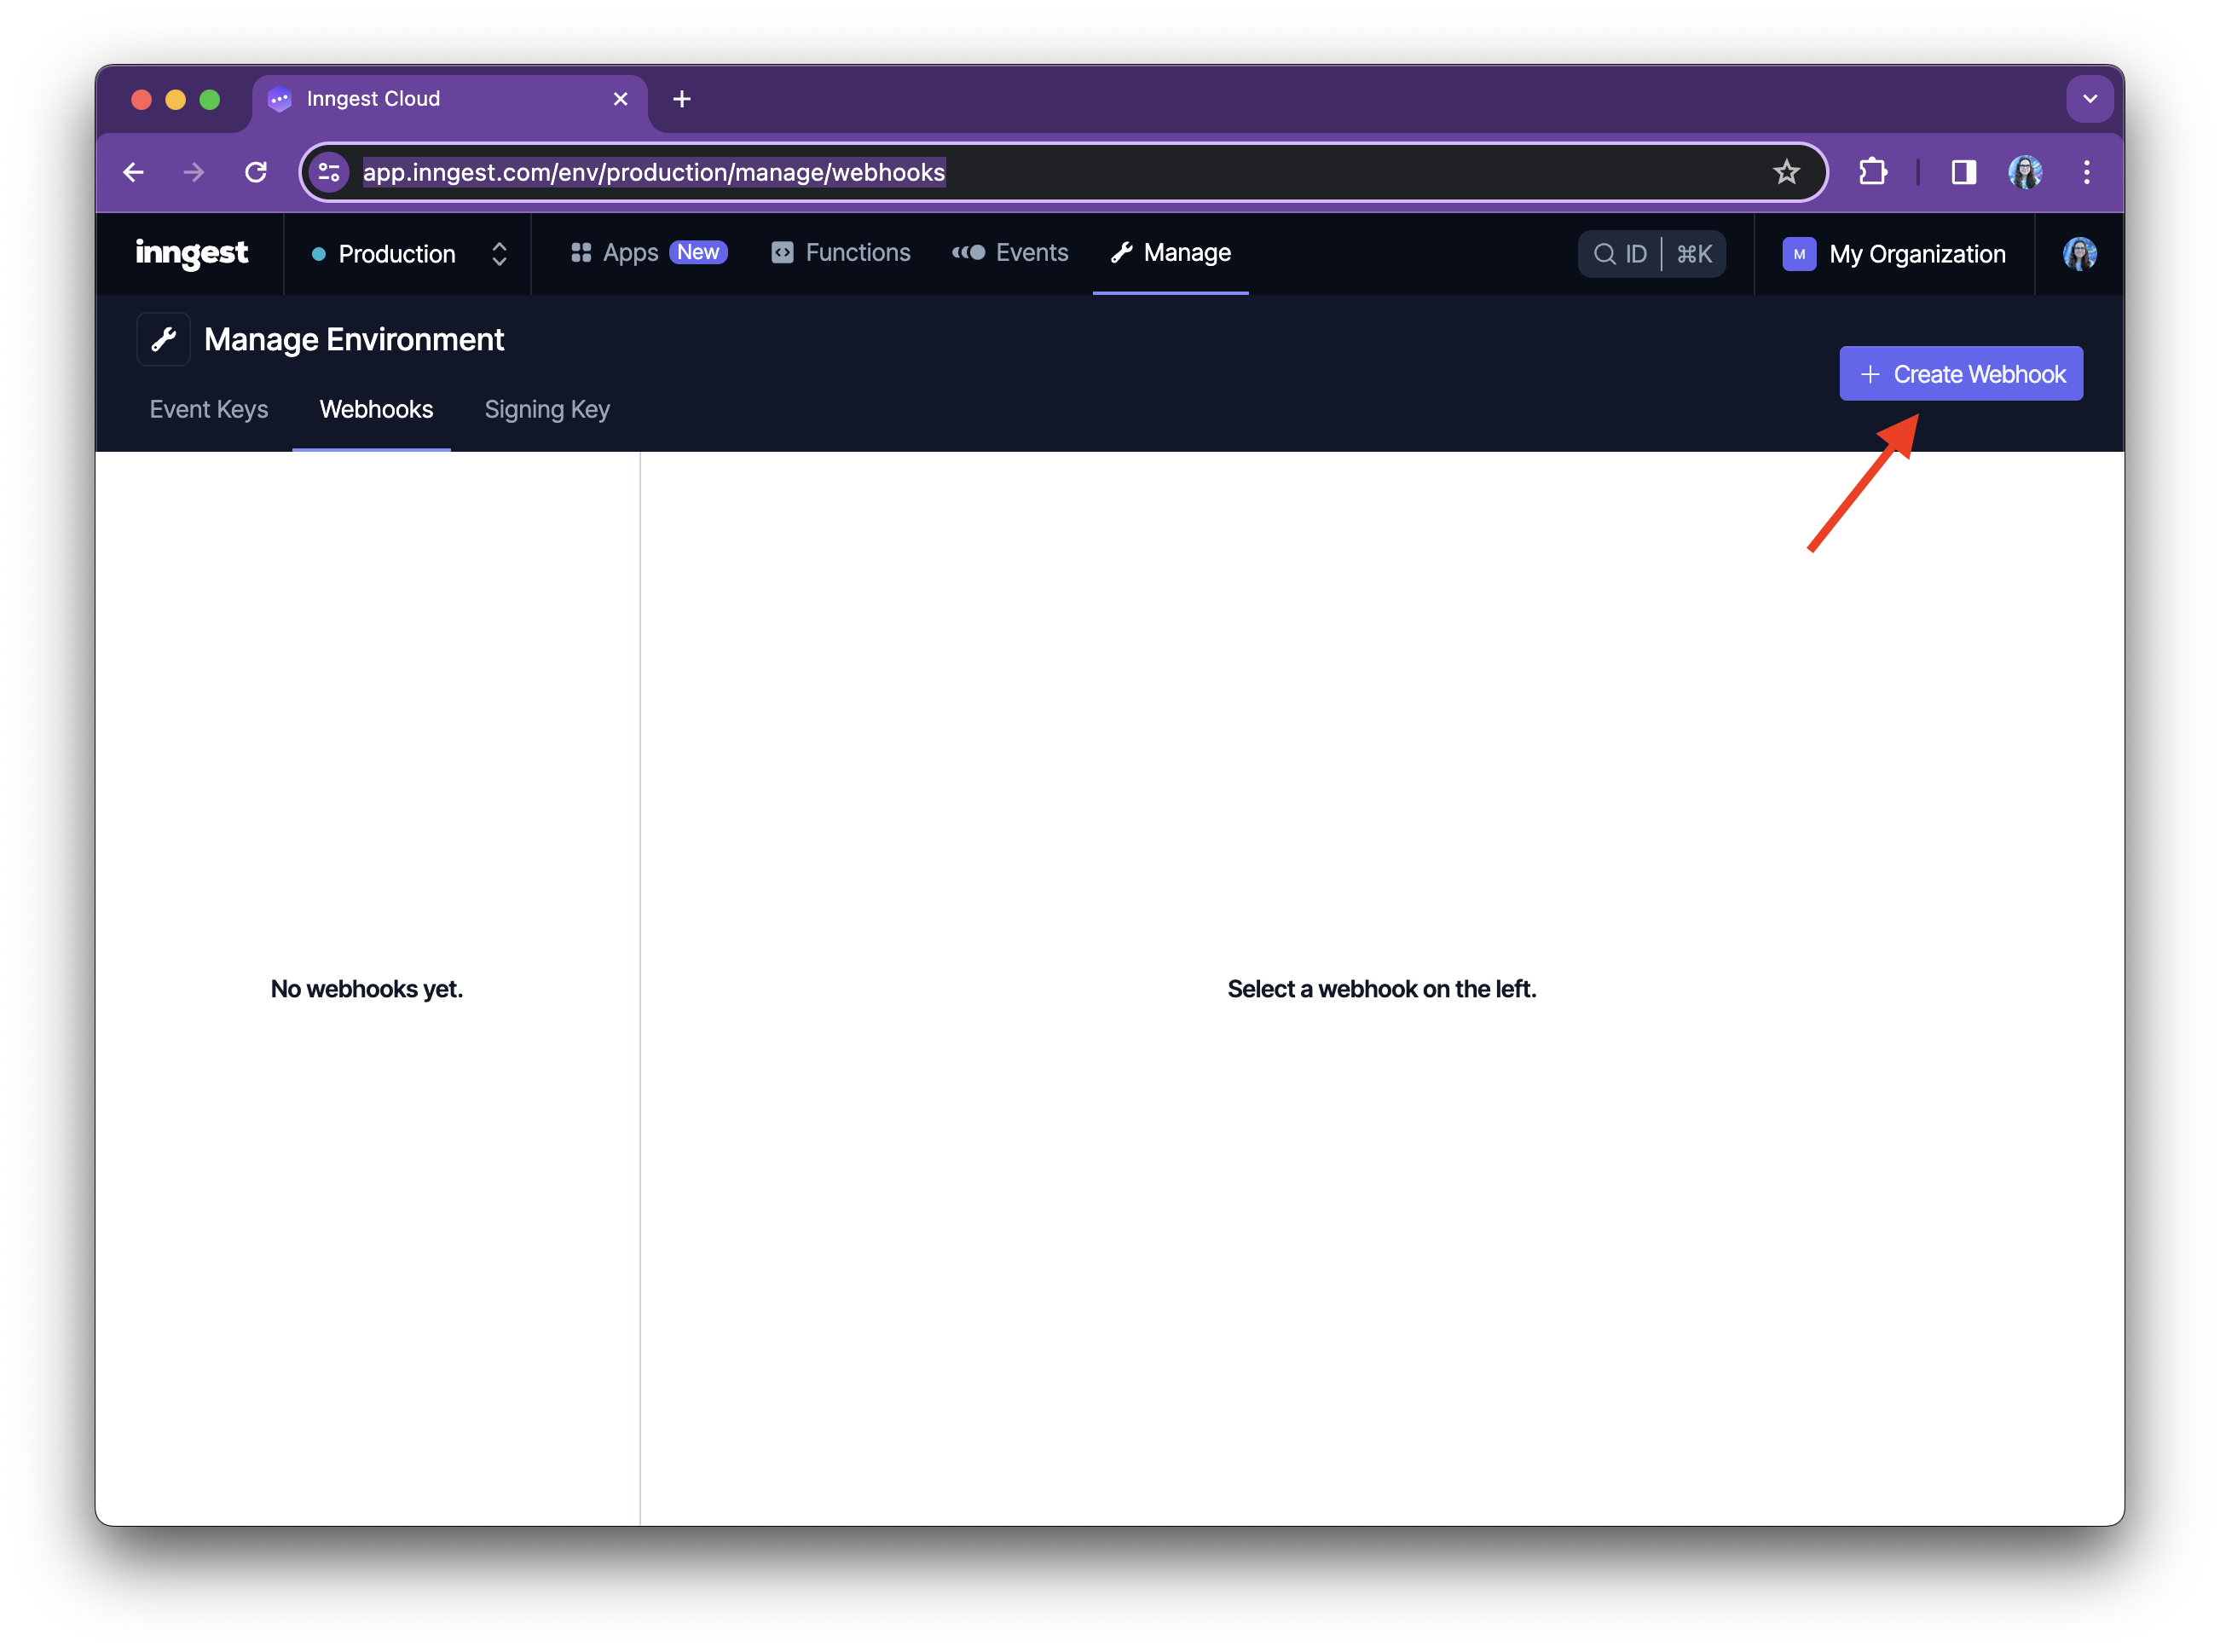
- Set up the Inngest webhook. To do so, in Inngest Cloud, navigate to Manage → Webhooks page and click on Create Webhook button on the right.
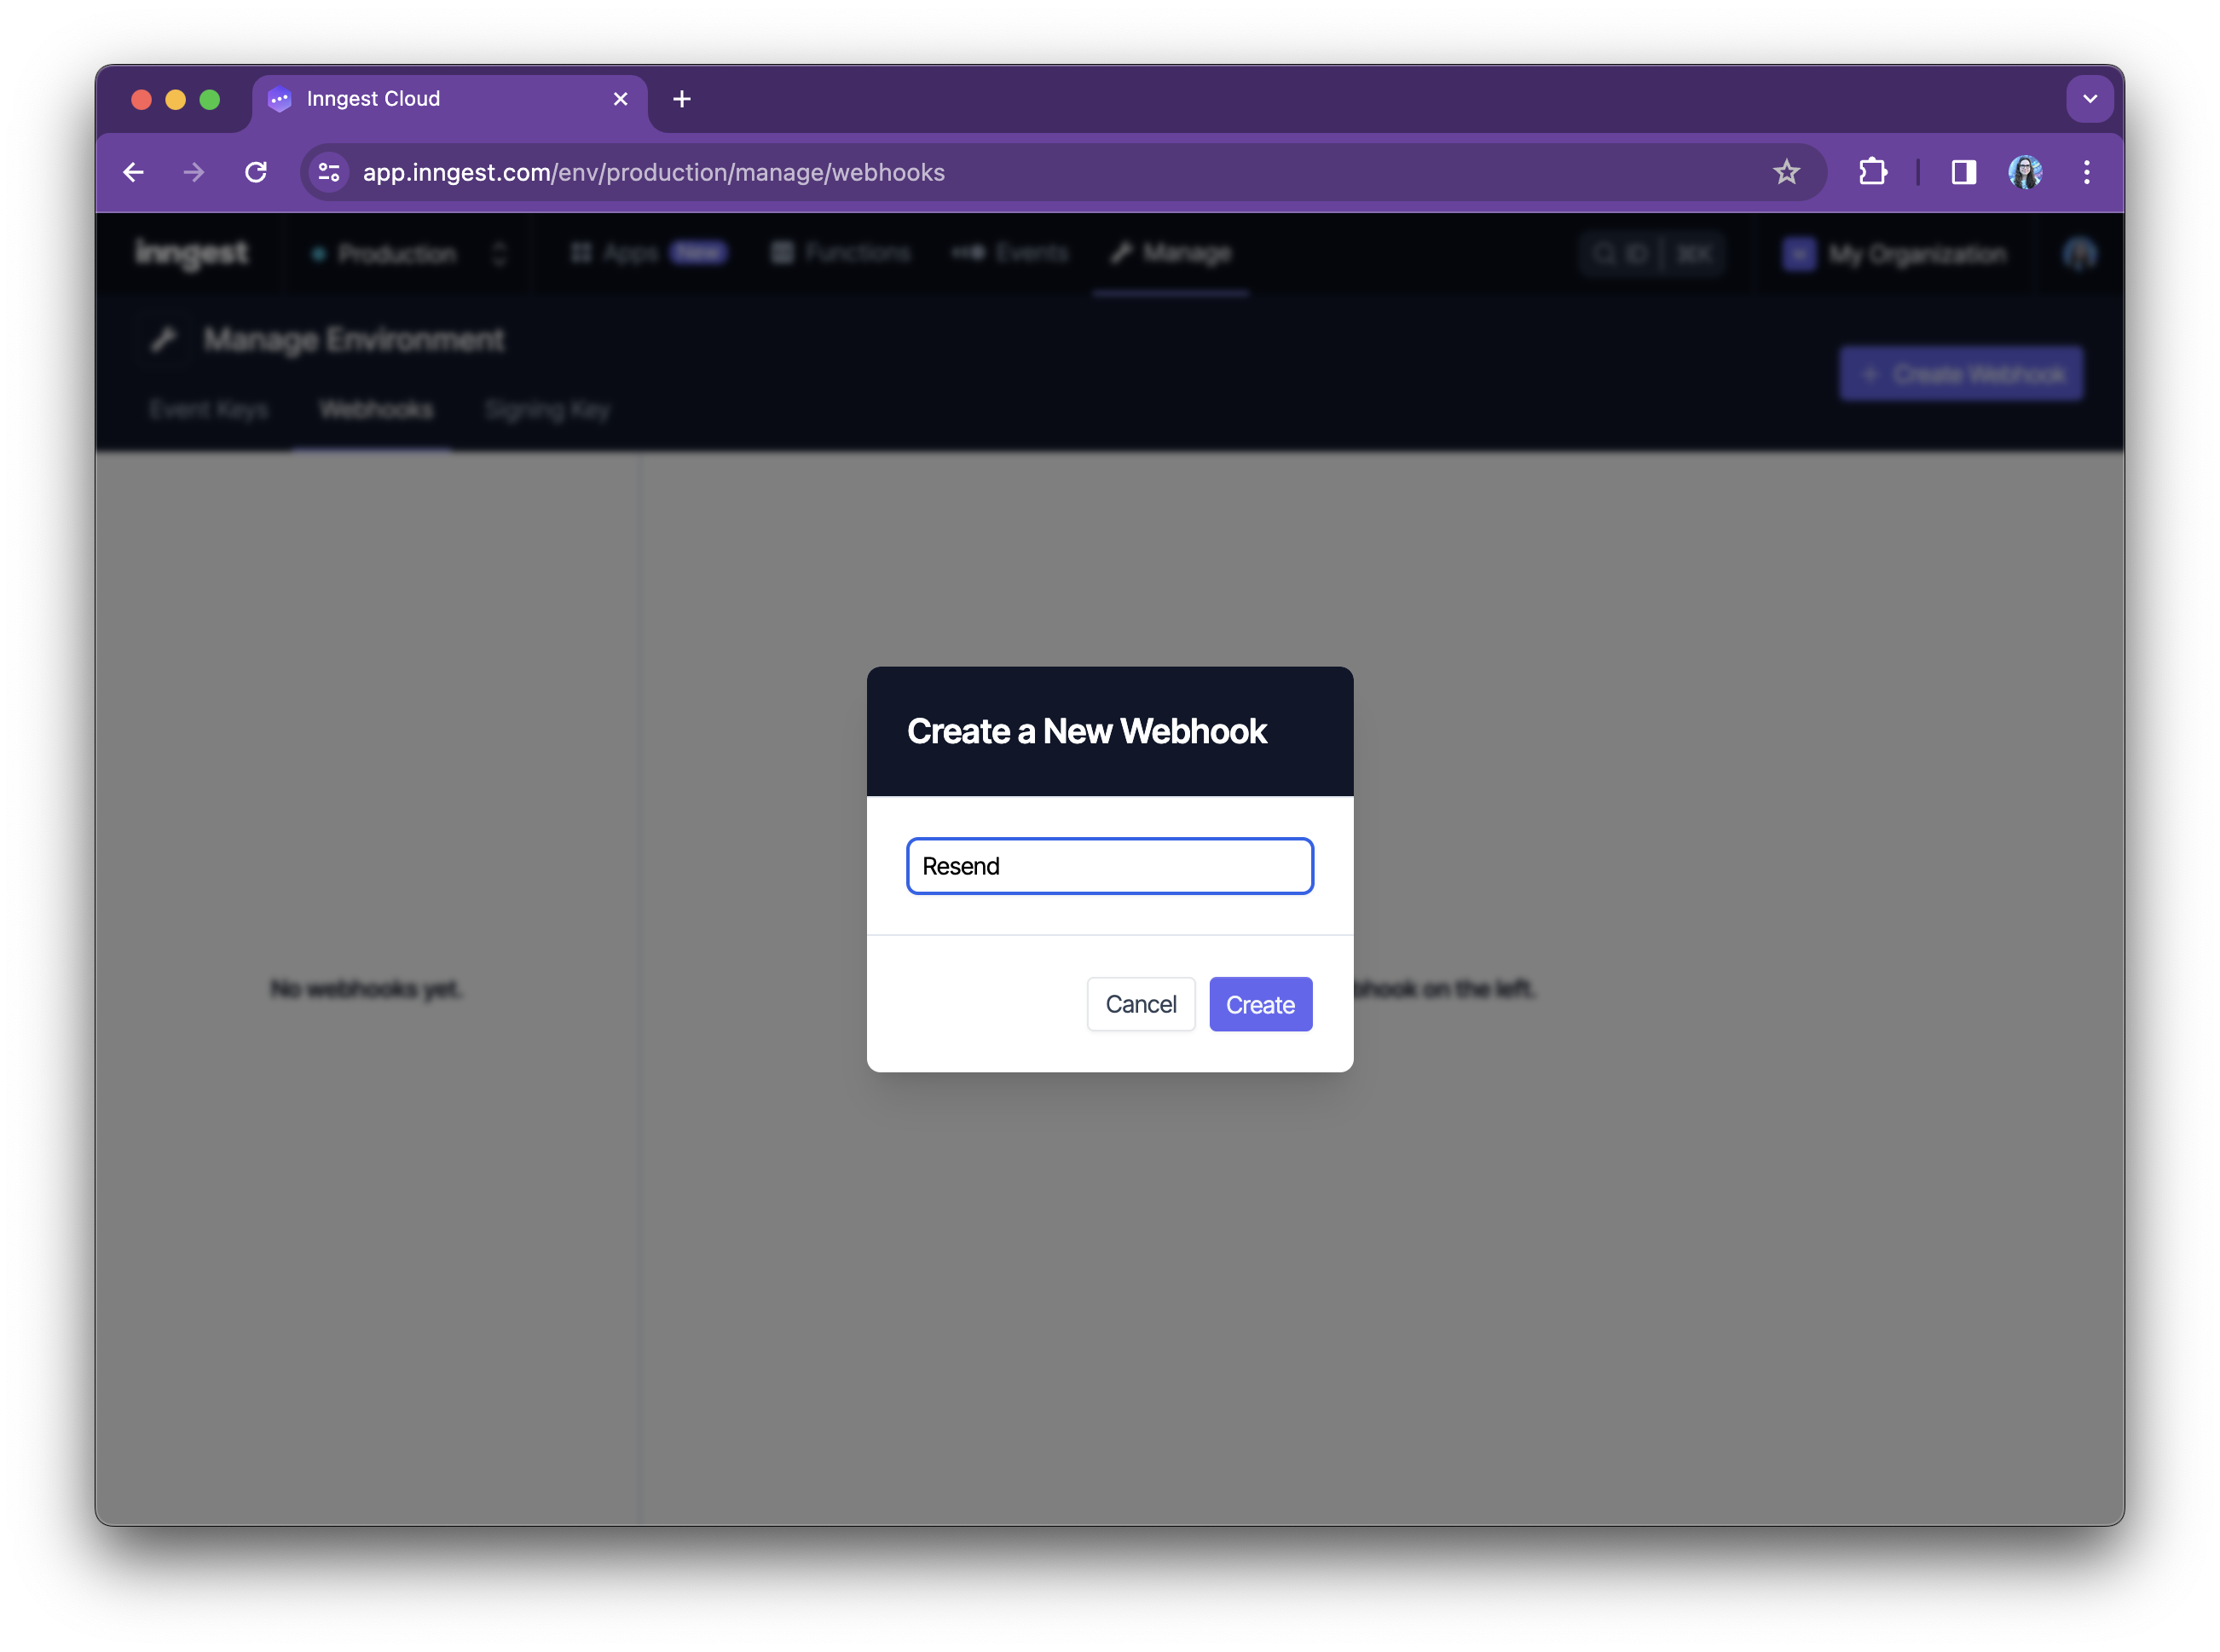
- In the modal window, specify the name of the webhook (for example, “Resend”):
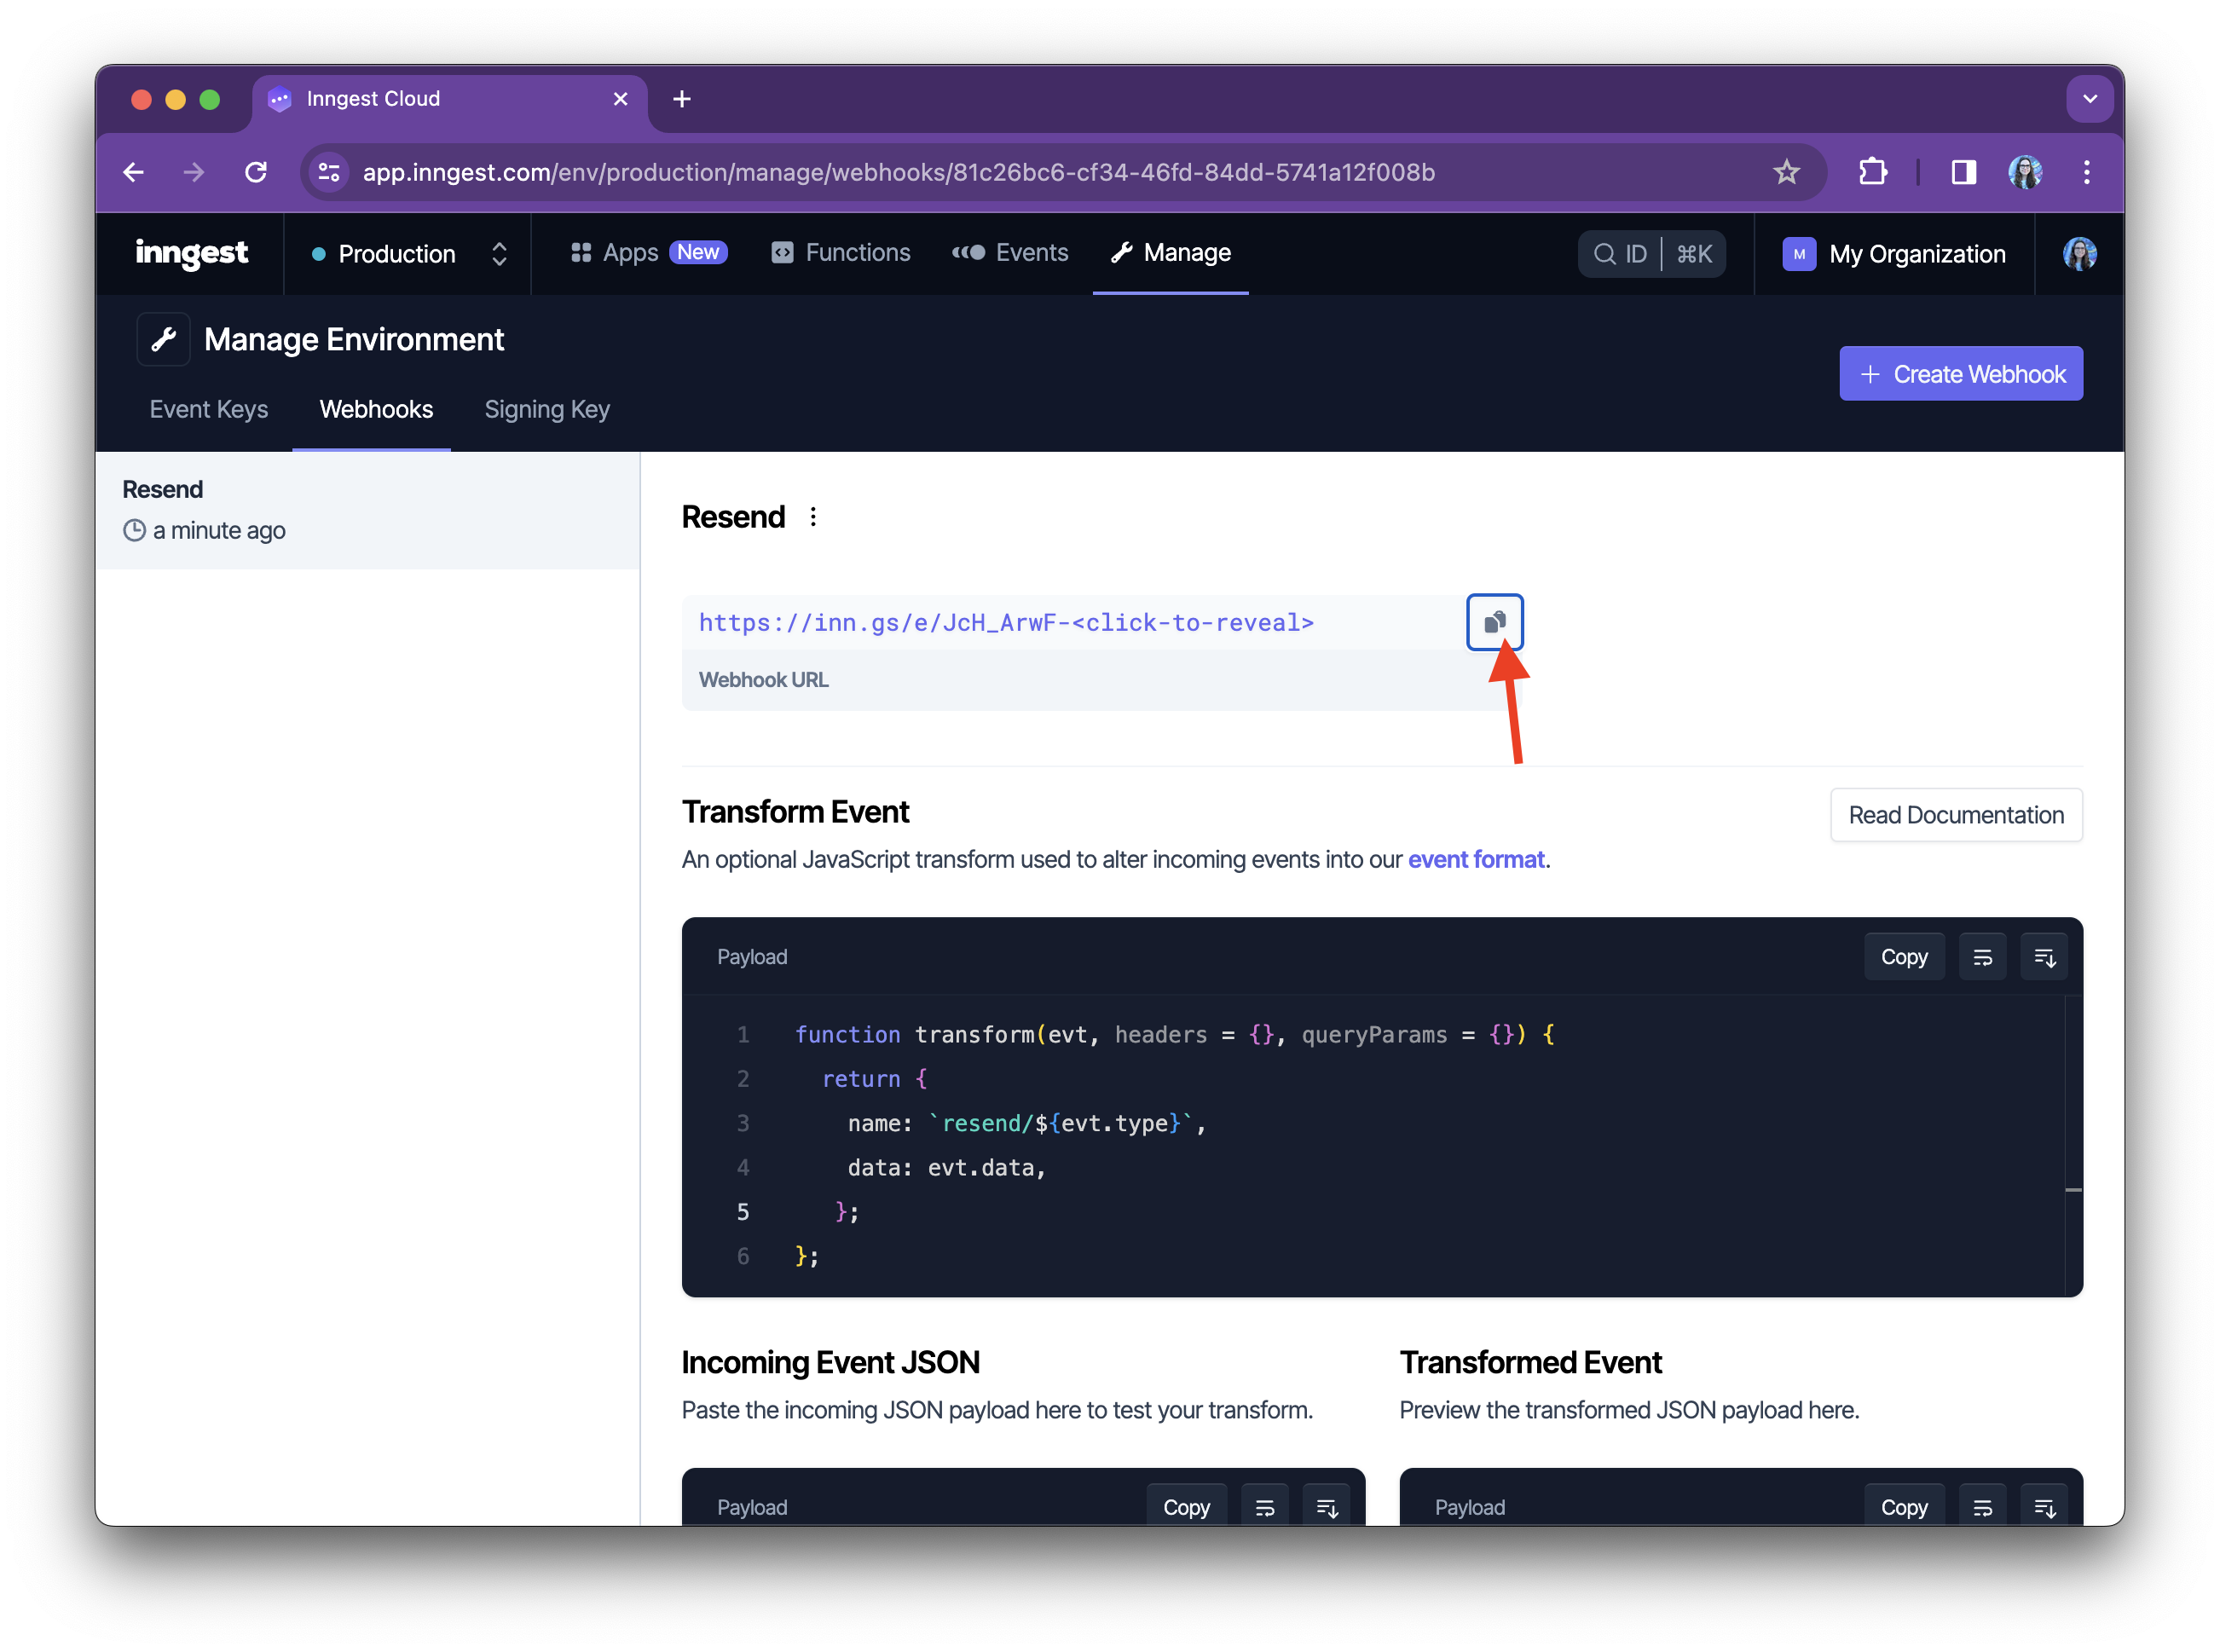
You will now see your webhook page with the webhook URL at the top:
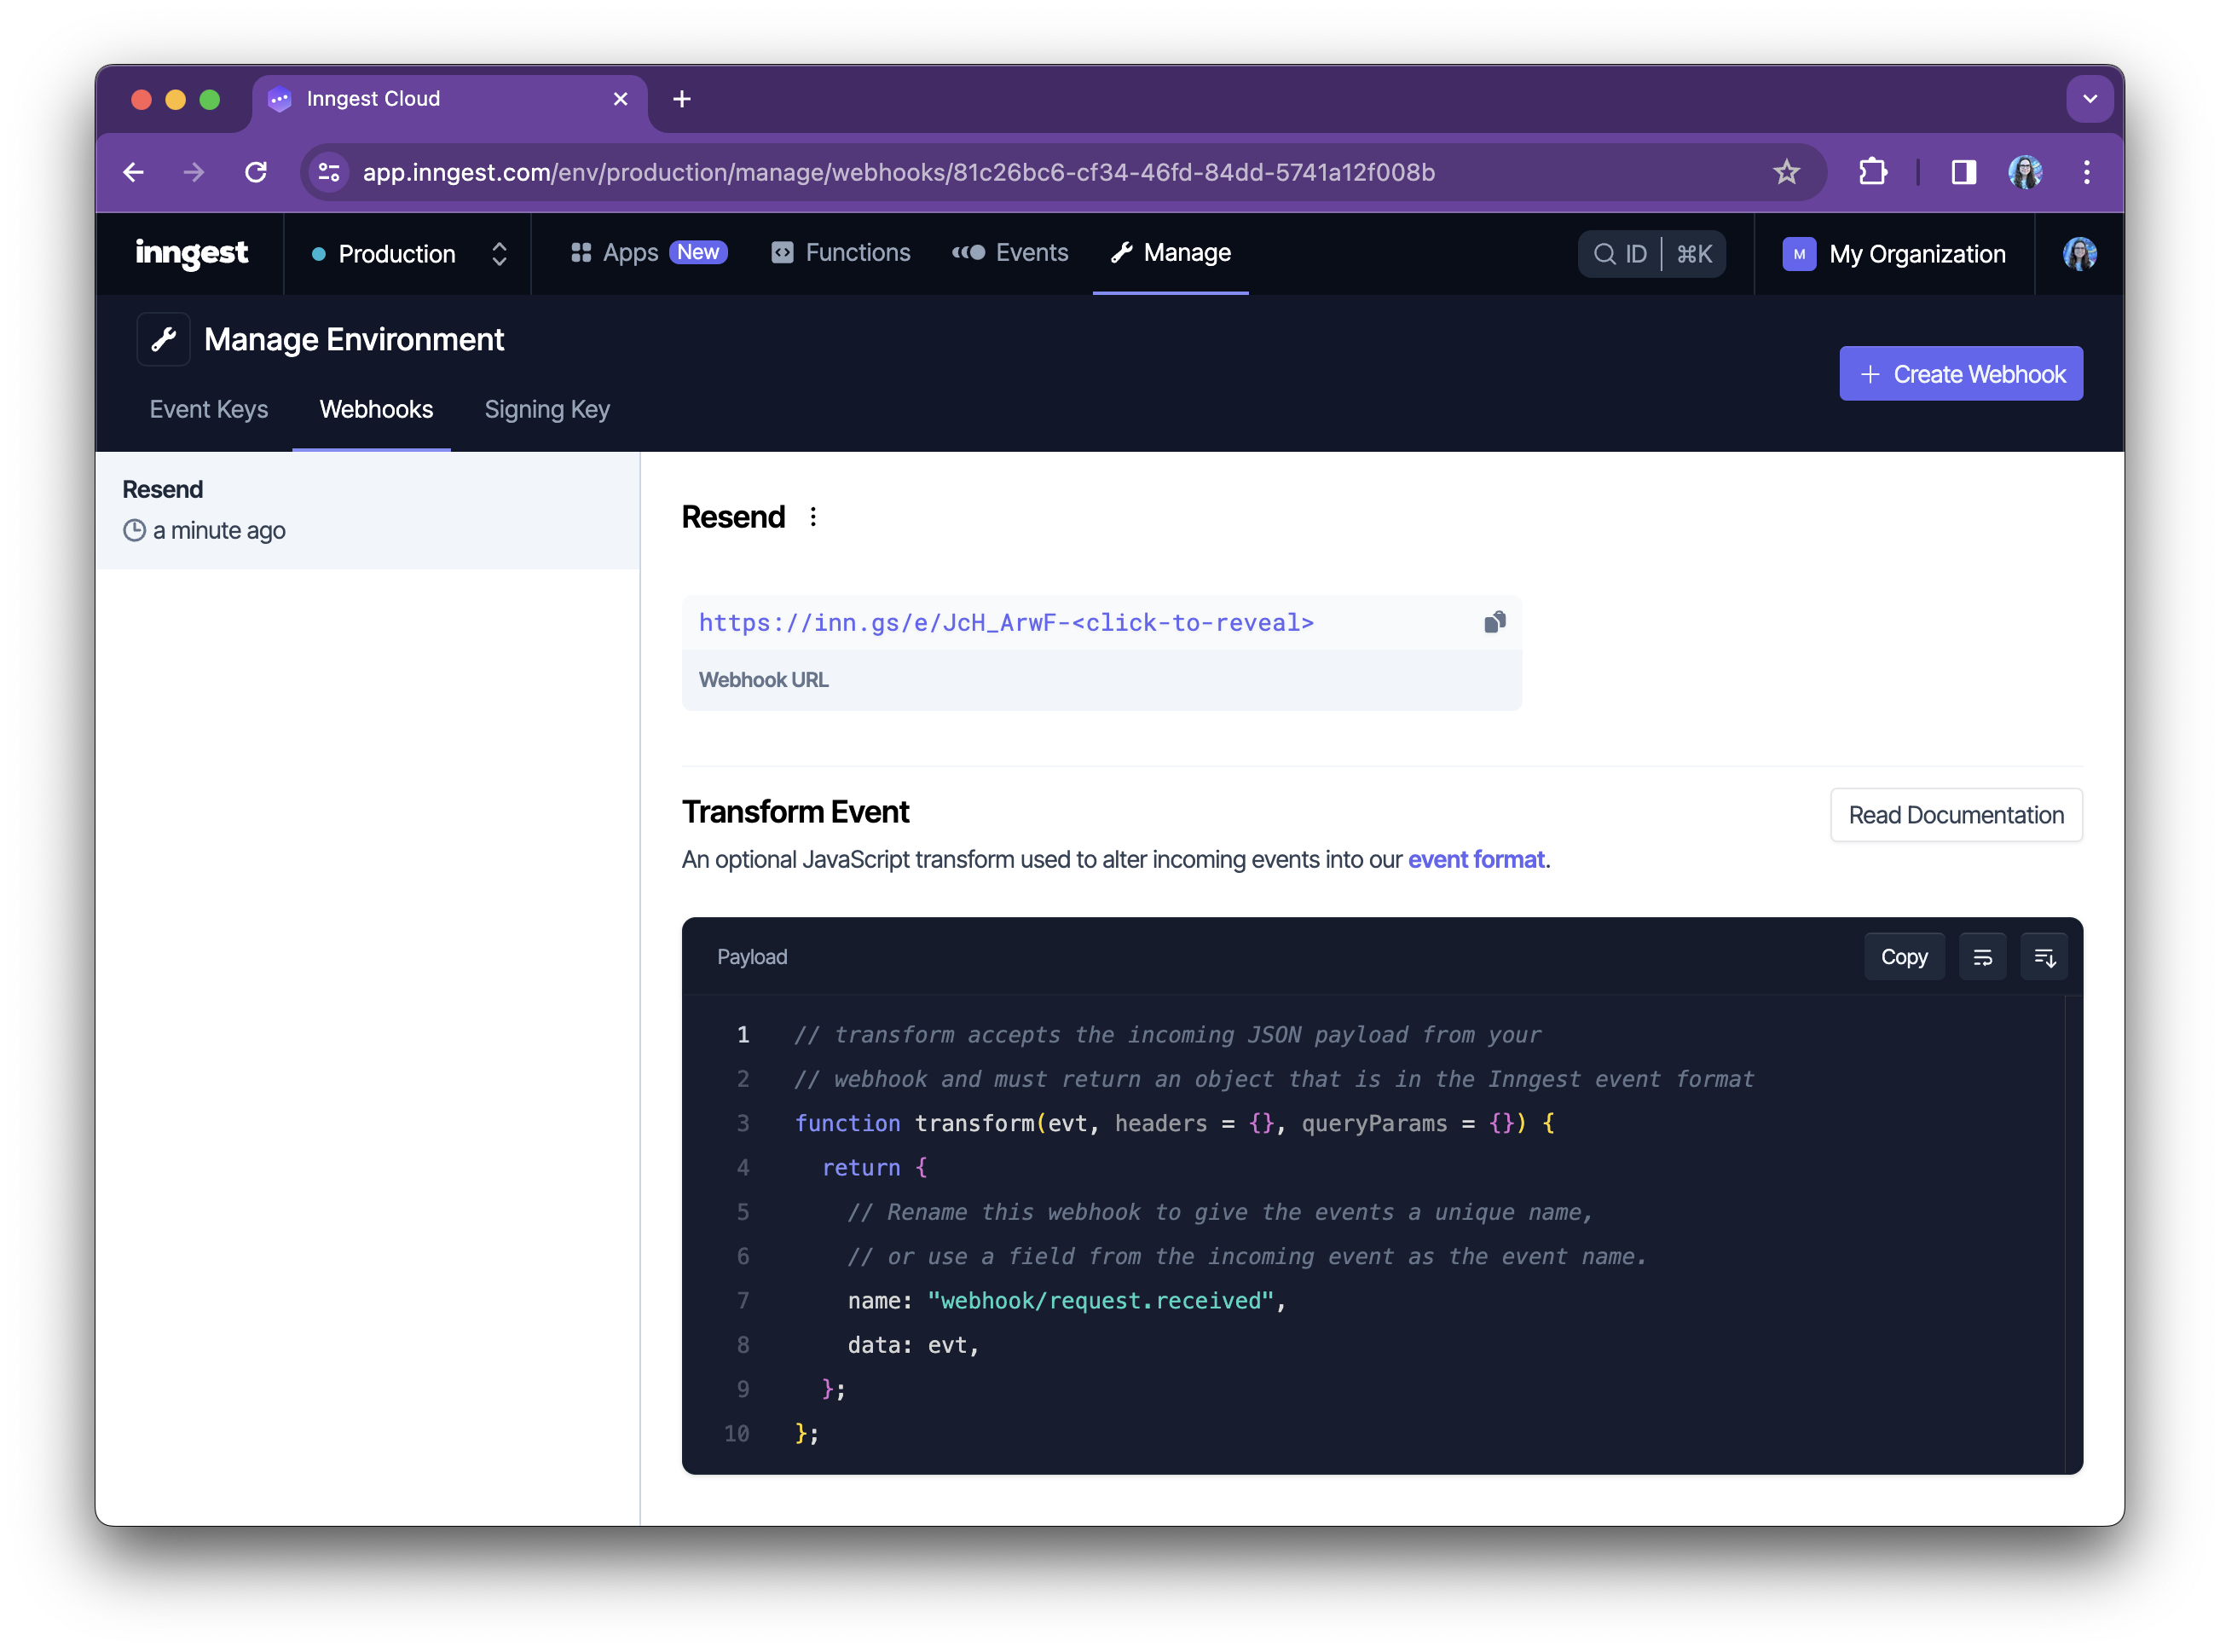
- Paste the following transform function into the Transform Event area:
function transform(evt, headers = {}, queryParams = {}) {
  return {
    // Add a prefix to the name of the event
    name: `resend/${evt.type}`,
    data: evt.data,
   };
};
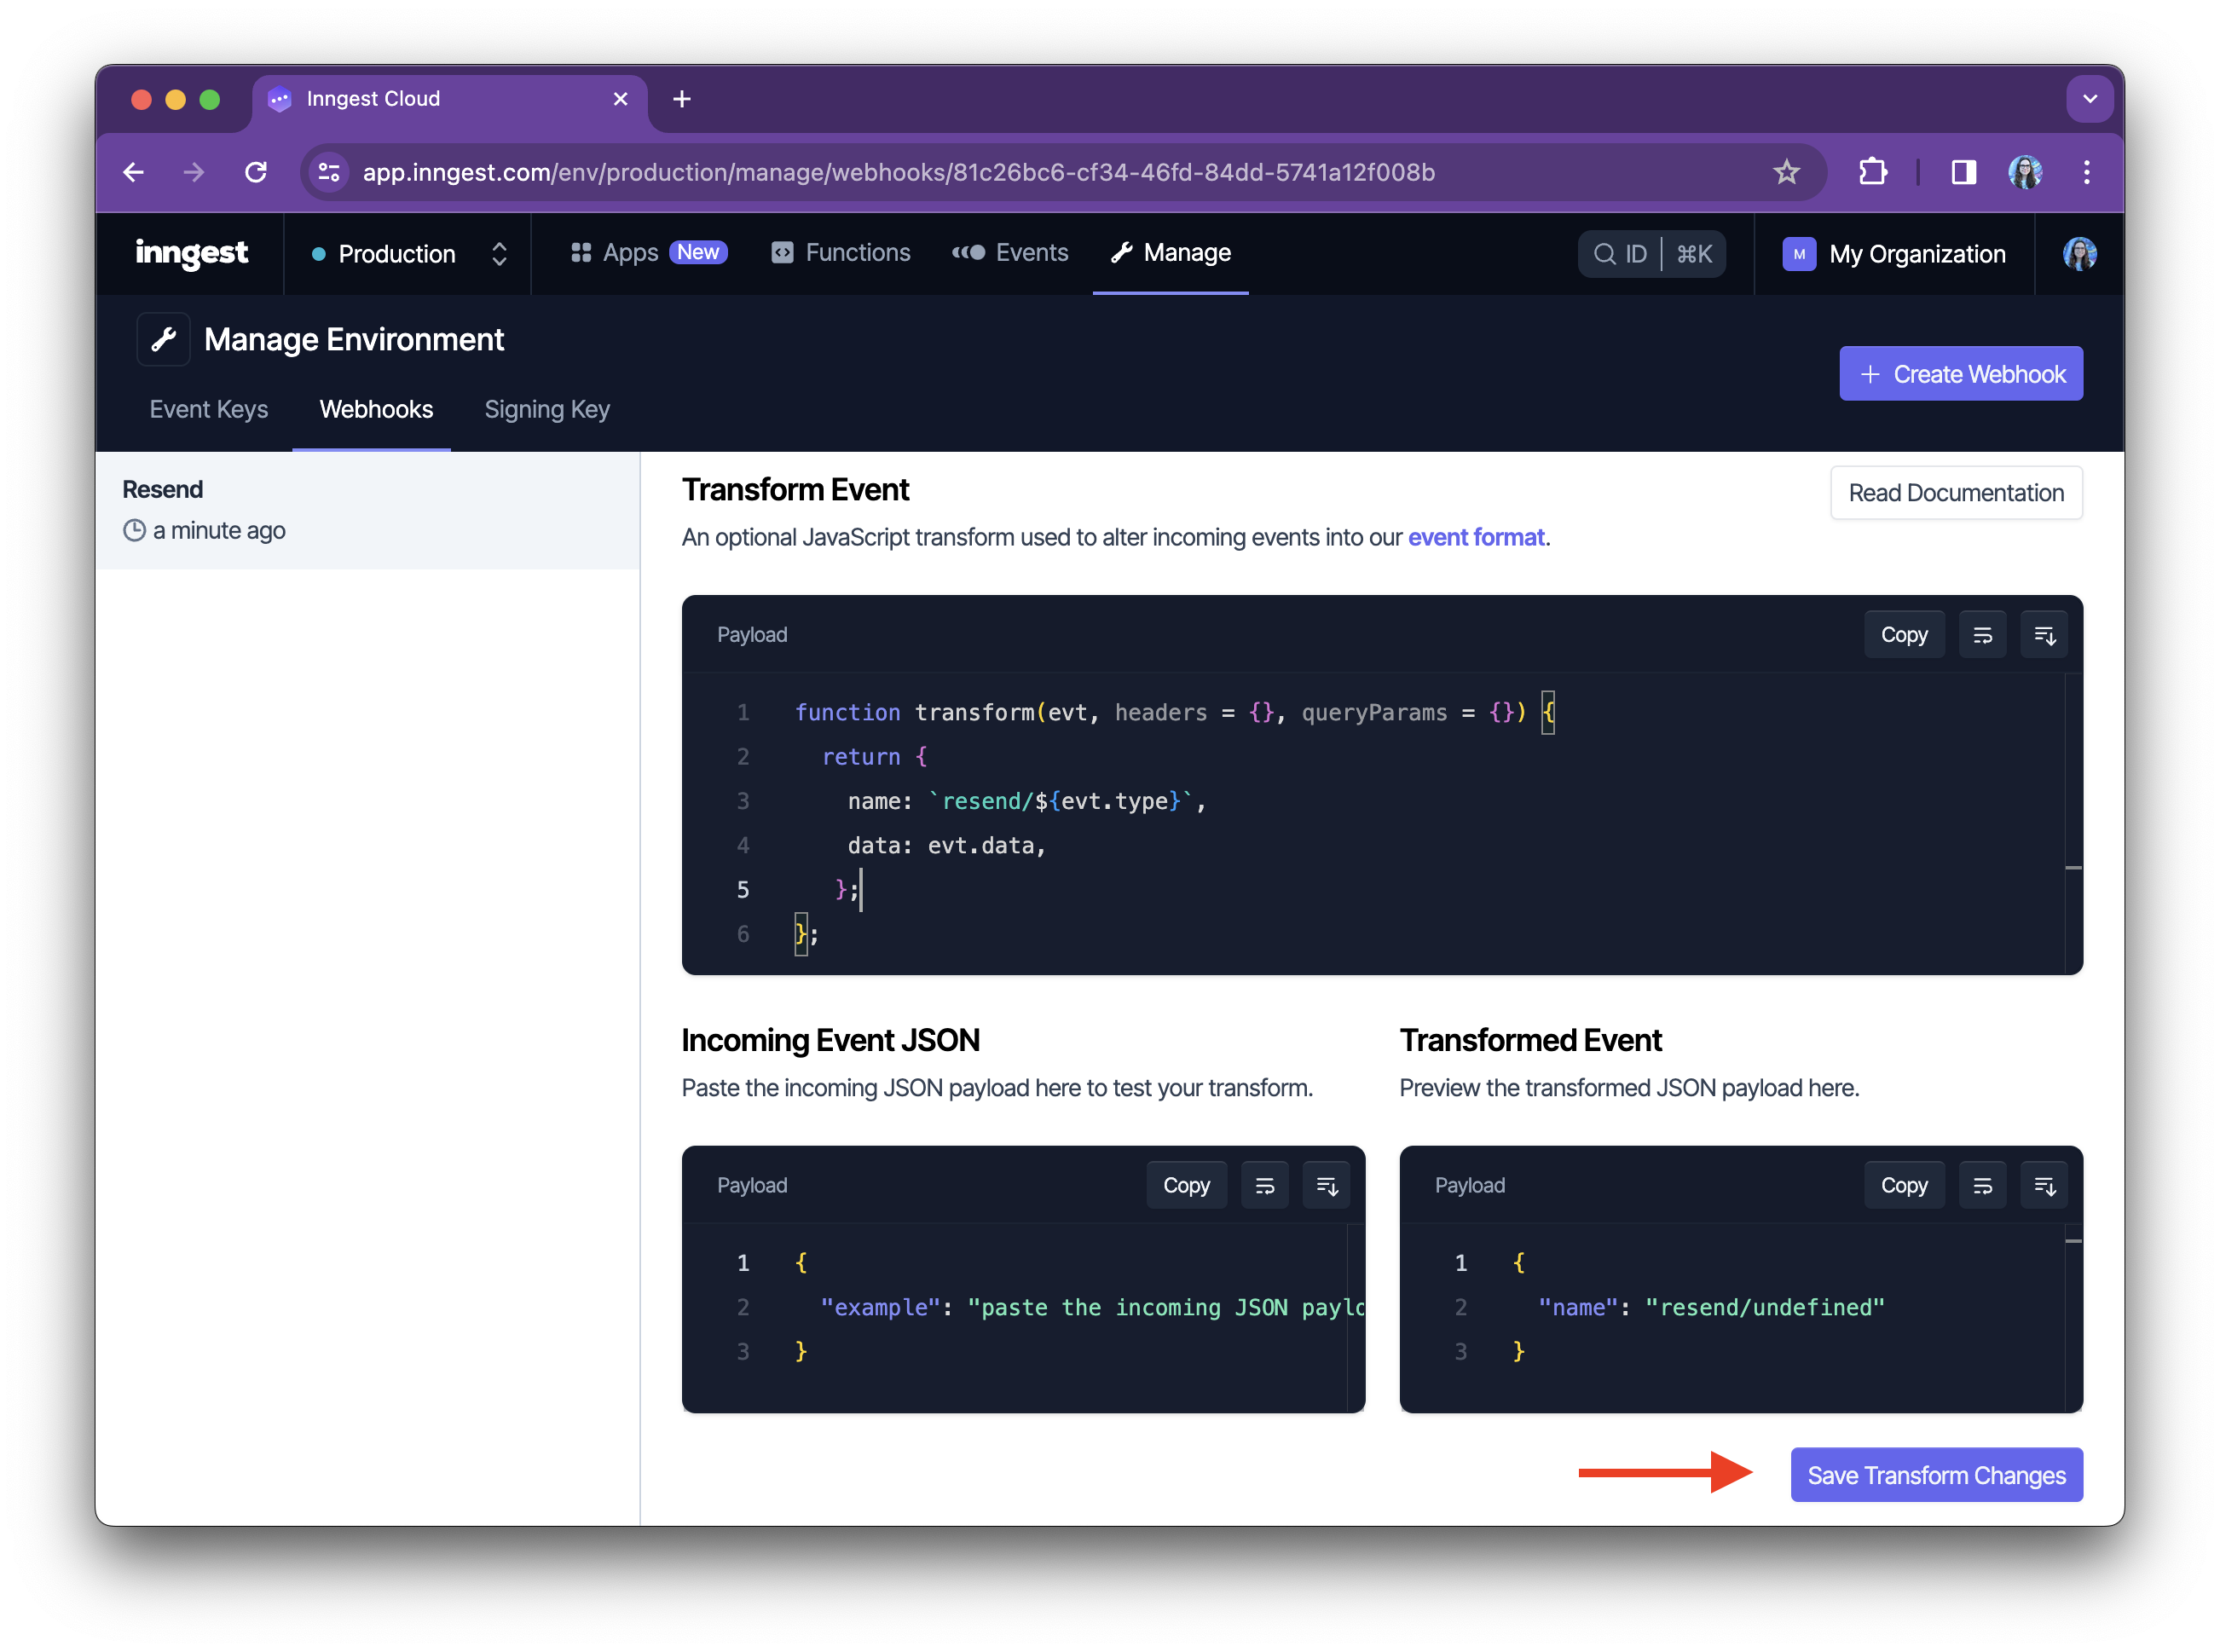
The transform function will translate the incoming data to be compatible with the Inngest event payload format, as well as prefix all events with resend/.
Next, click Save Transformed Changes button to save this function.
Your Inngest webhook is set up!
- Go back to the top of the page and copy your webhook URL.
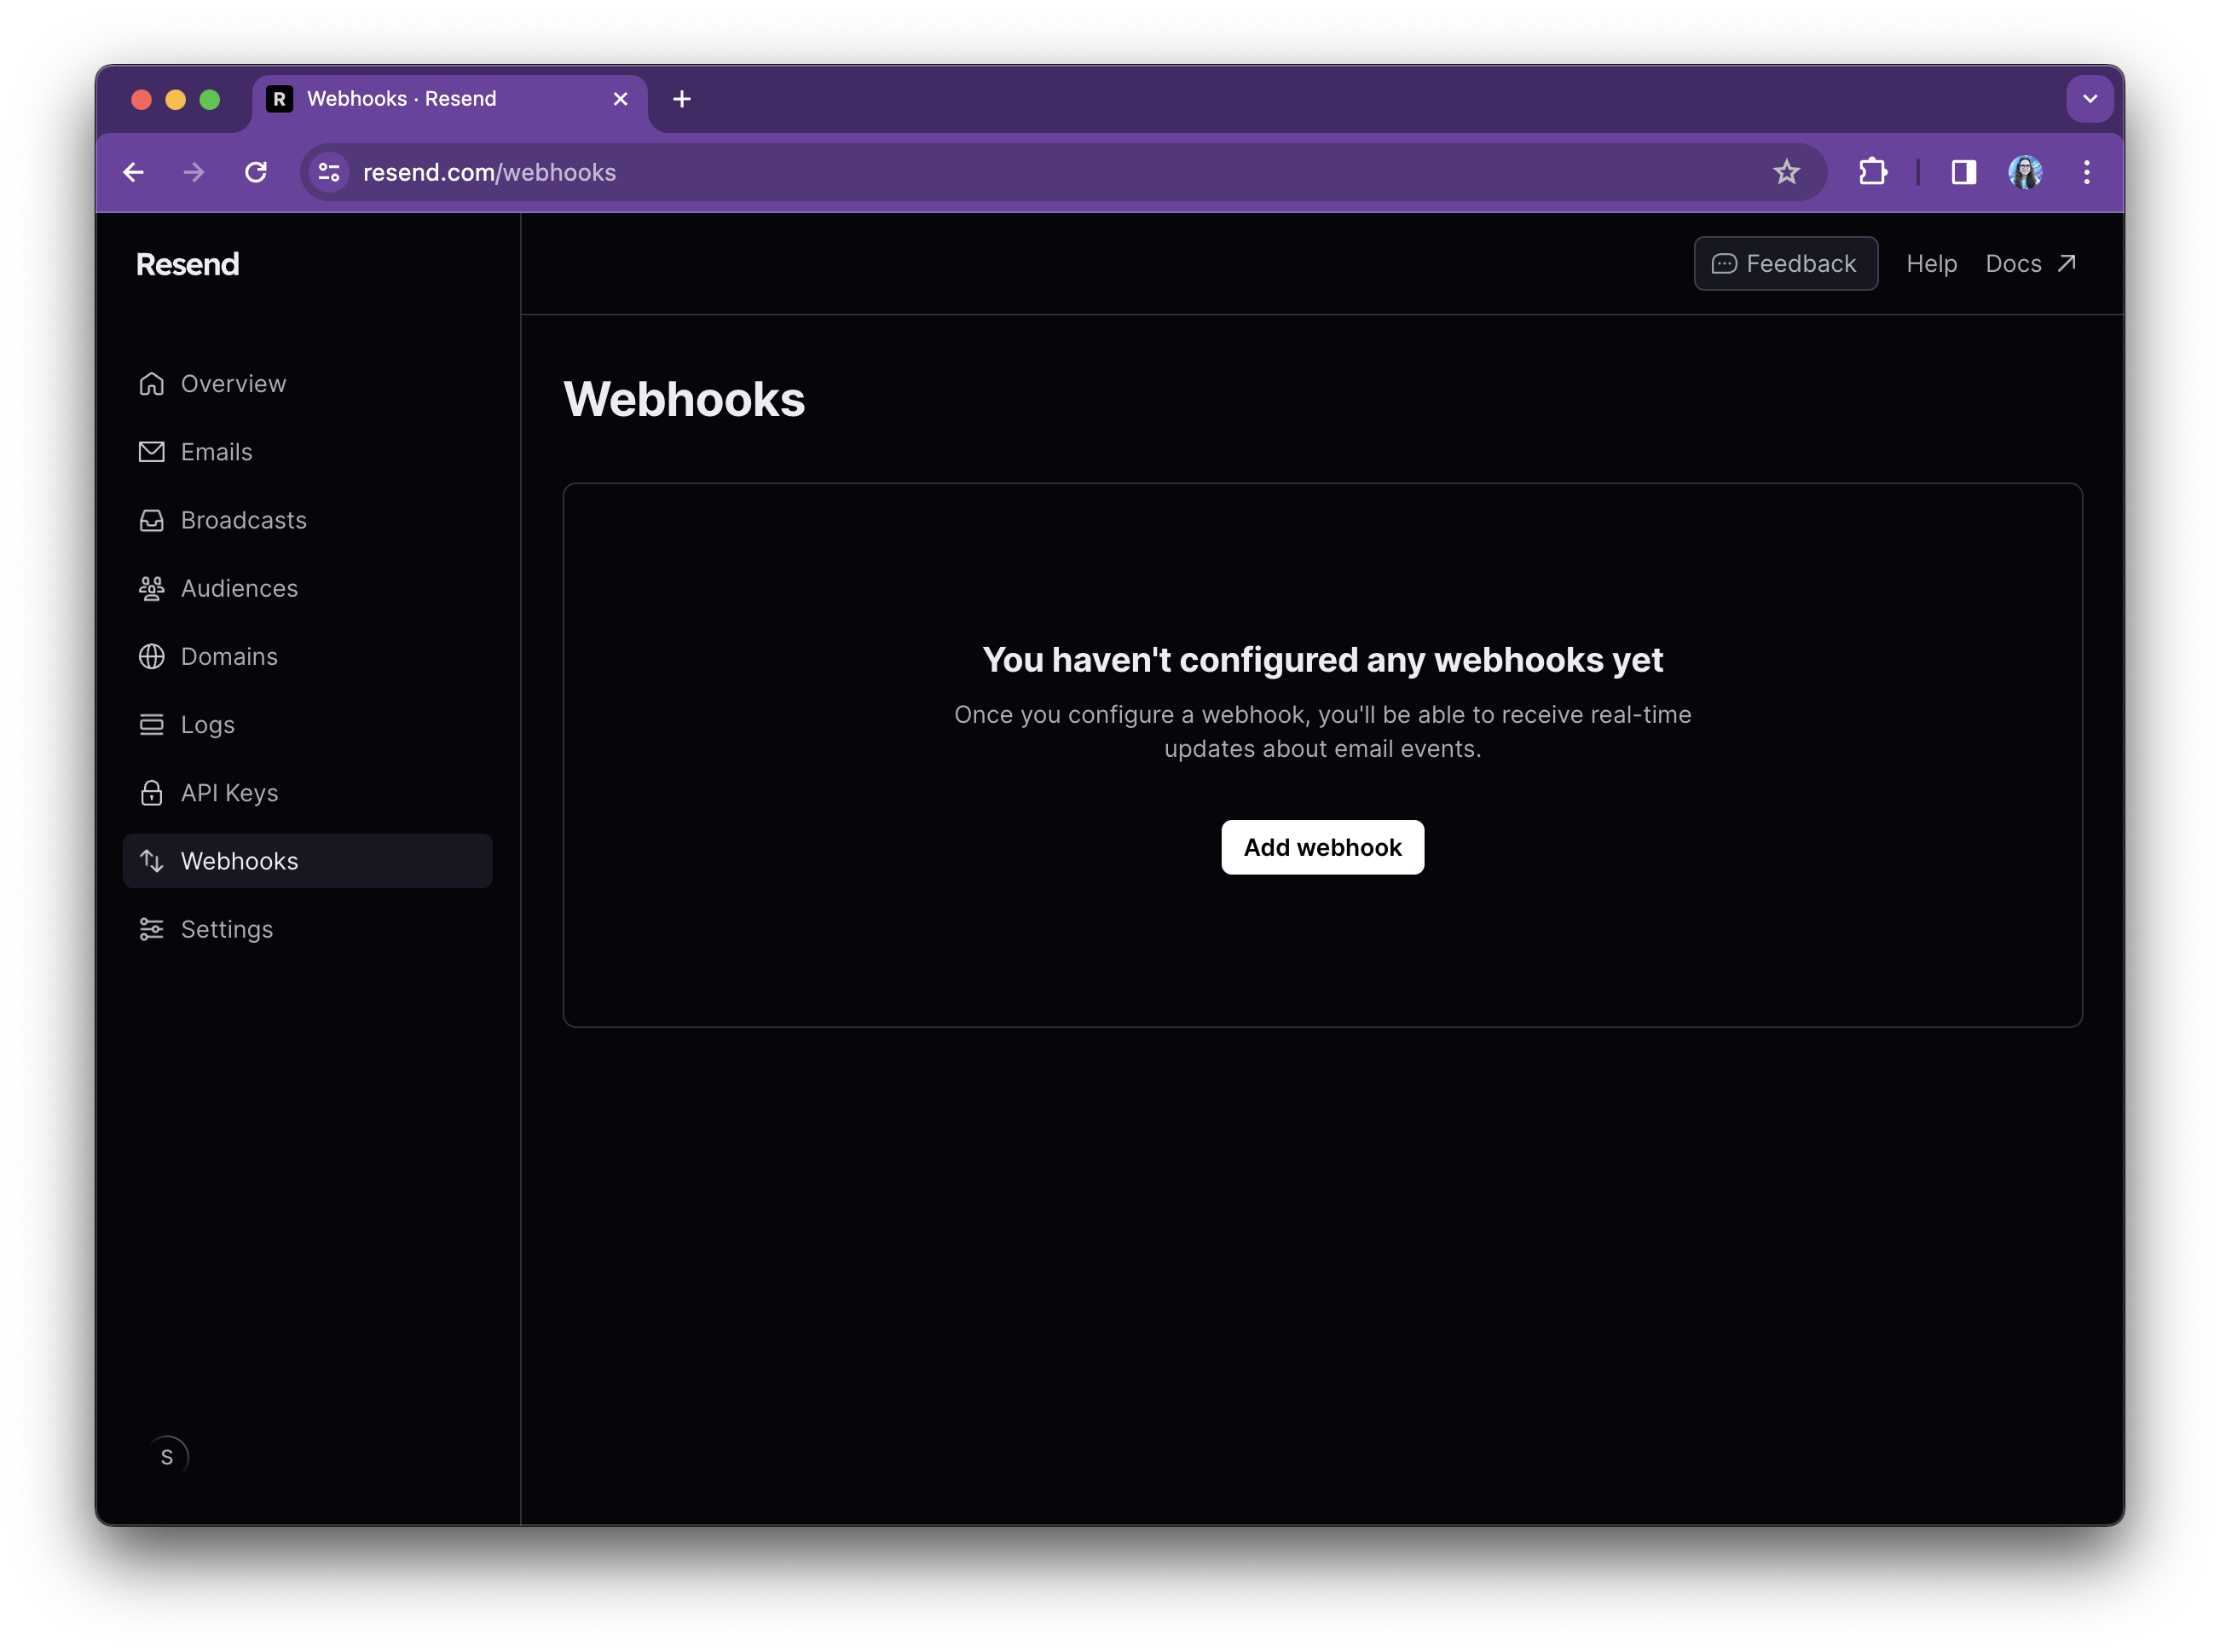
- Now navigate to the webhooks page in the Resend dashboard. Click on the Add webhook button:
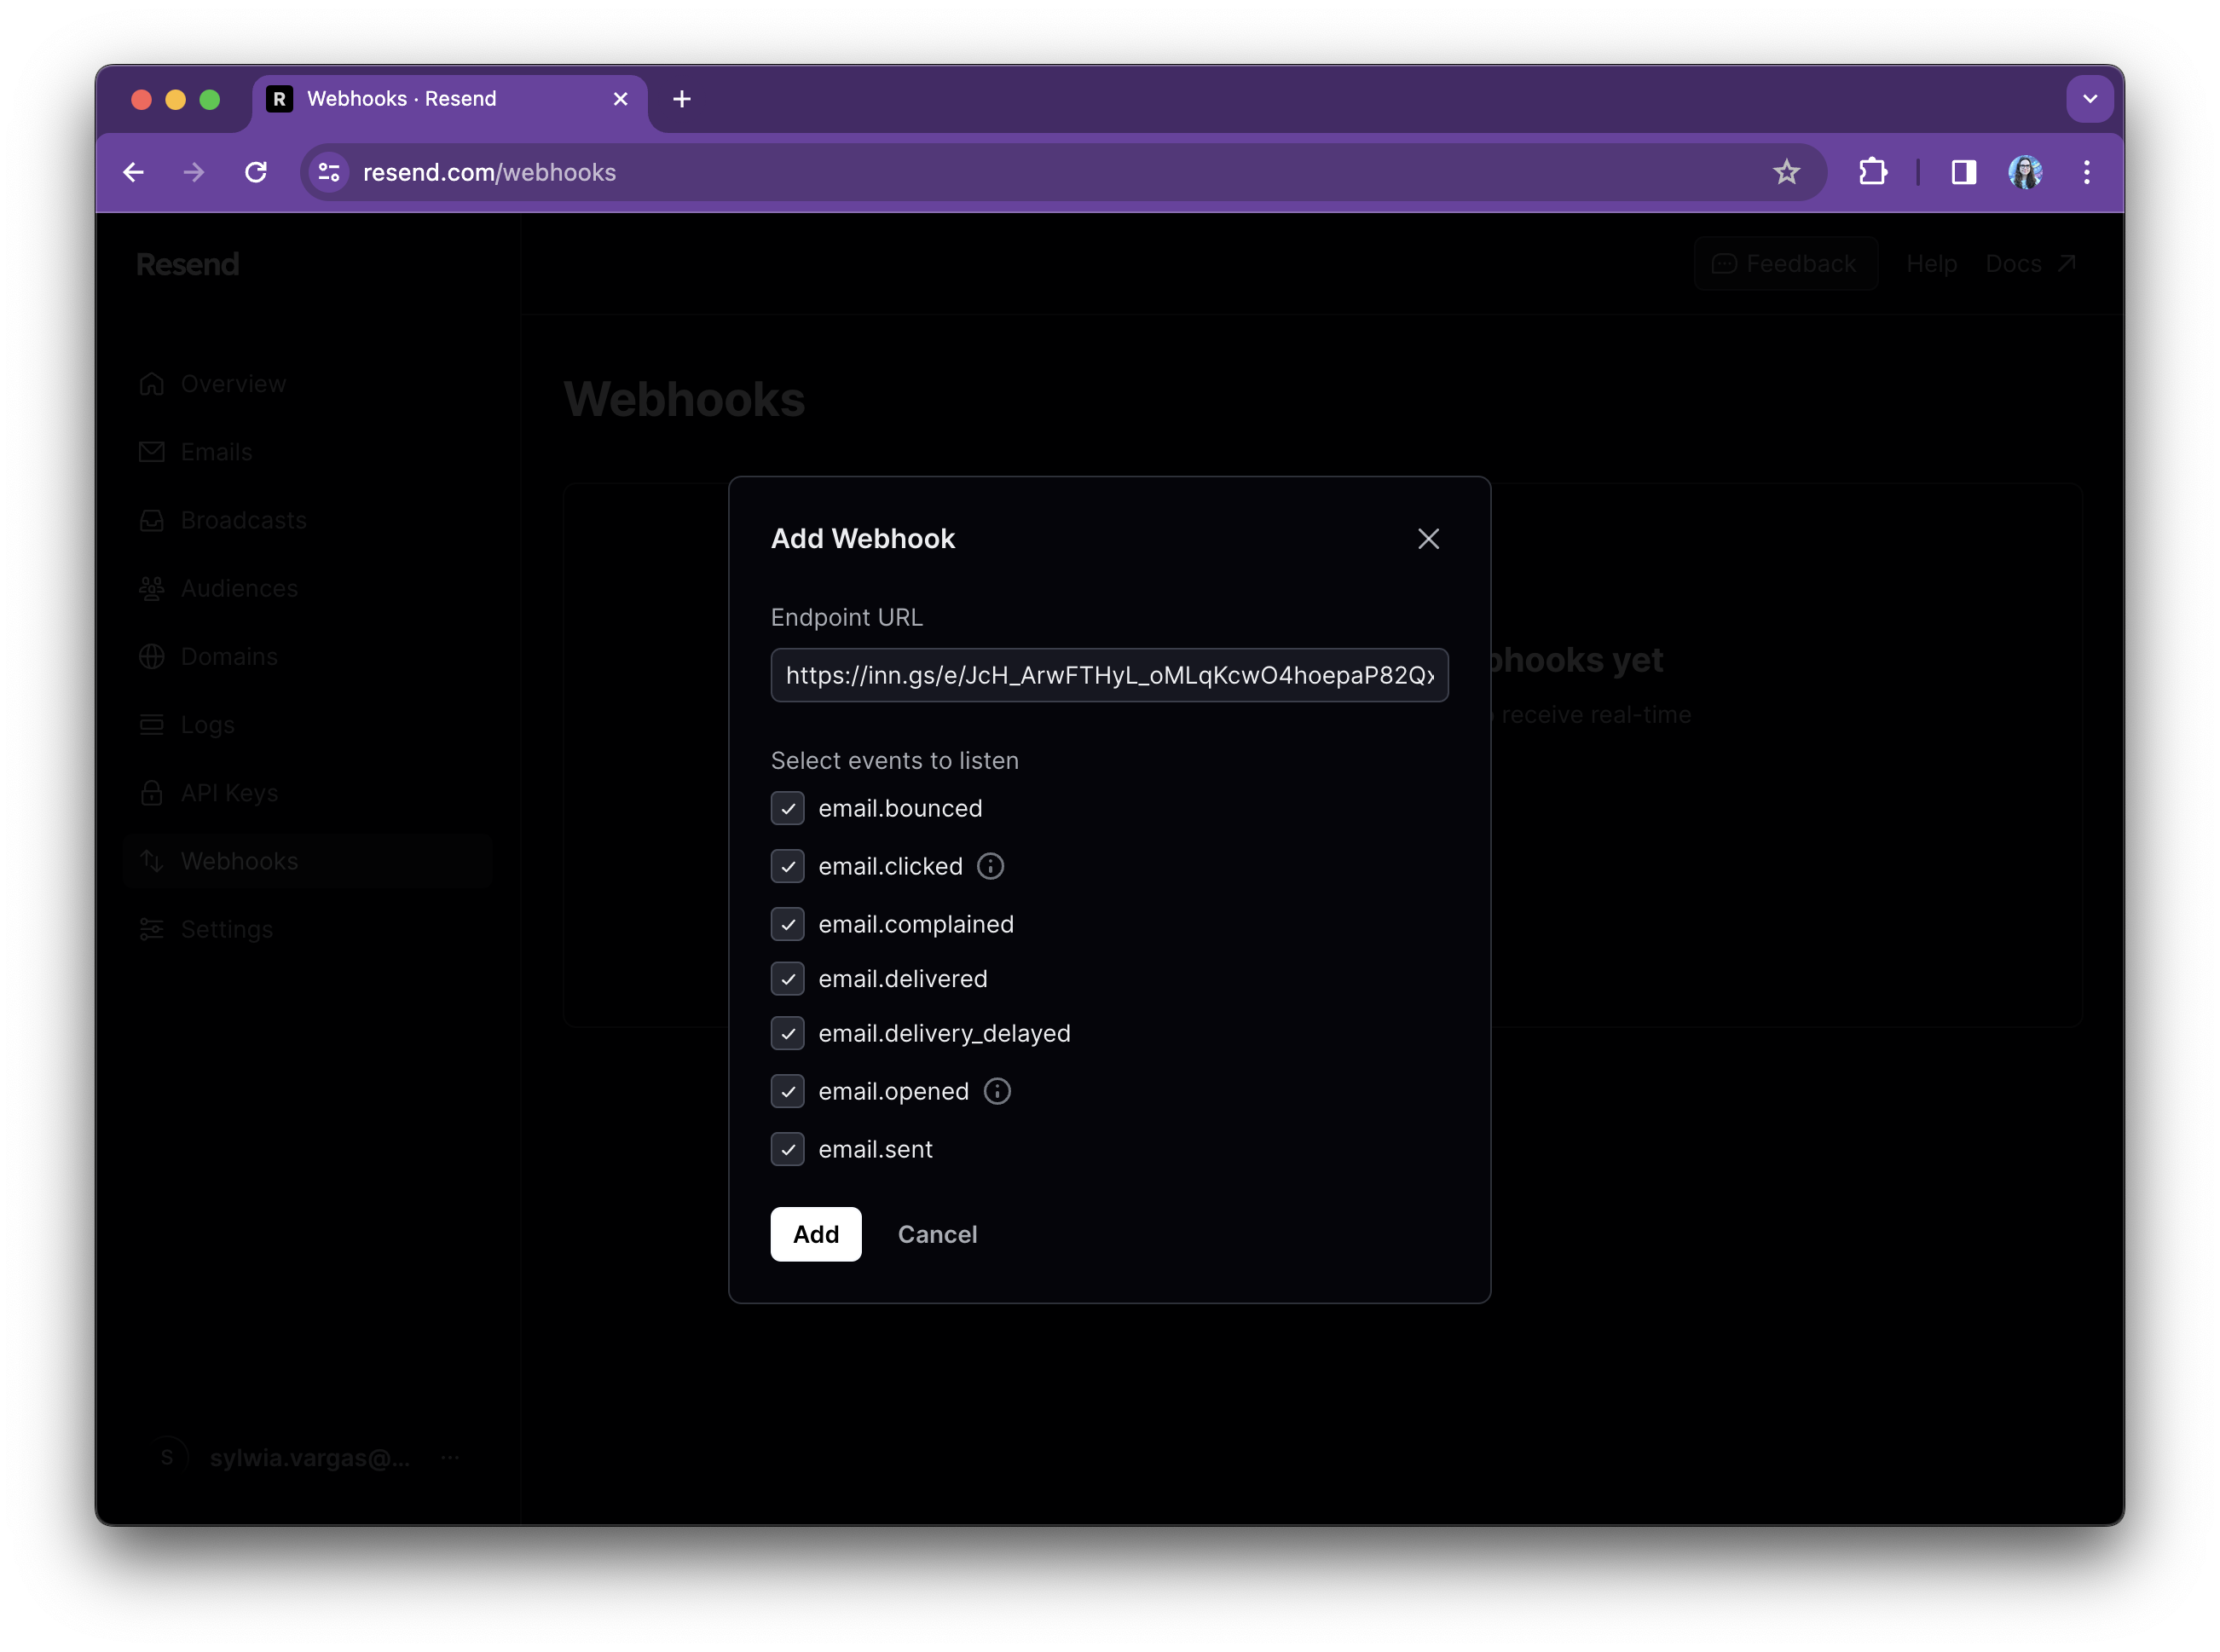
- In the modal, paste the Inngest webhook URL and choose which events you want to listen to -- tick all of them for now.
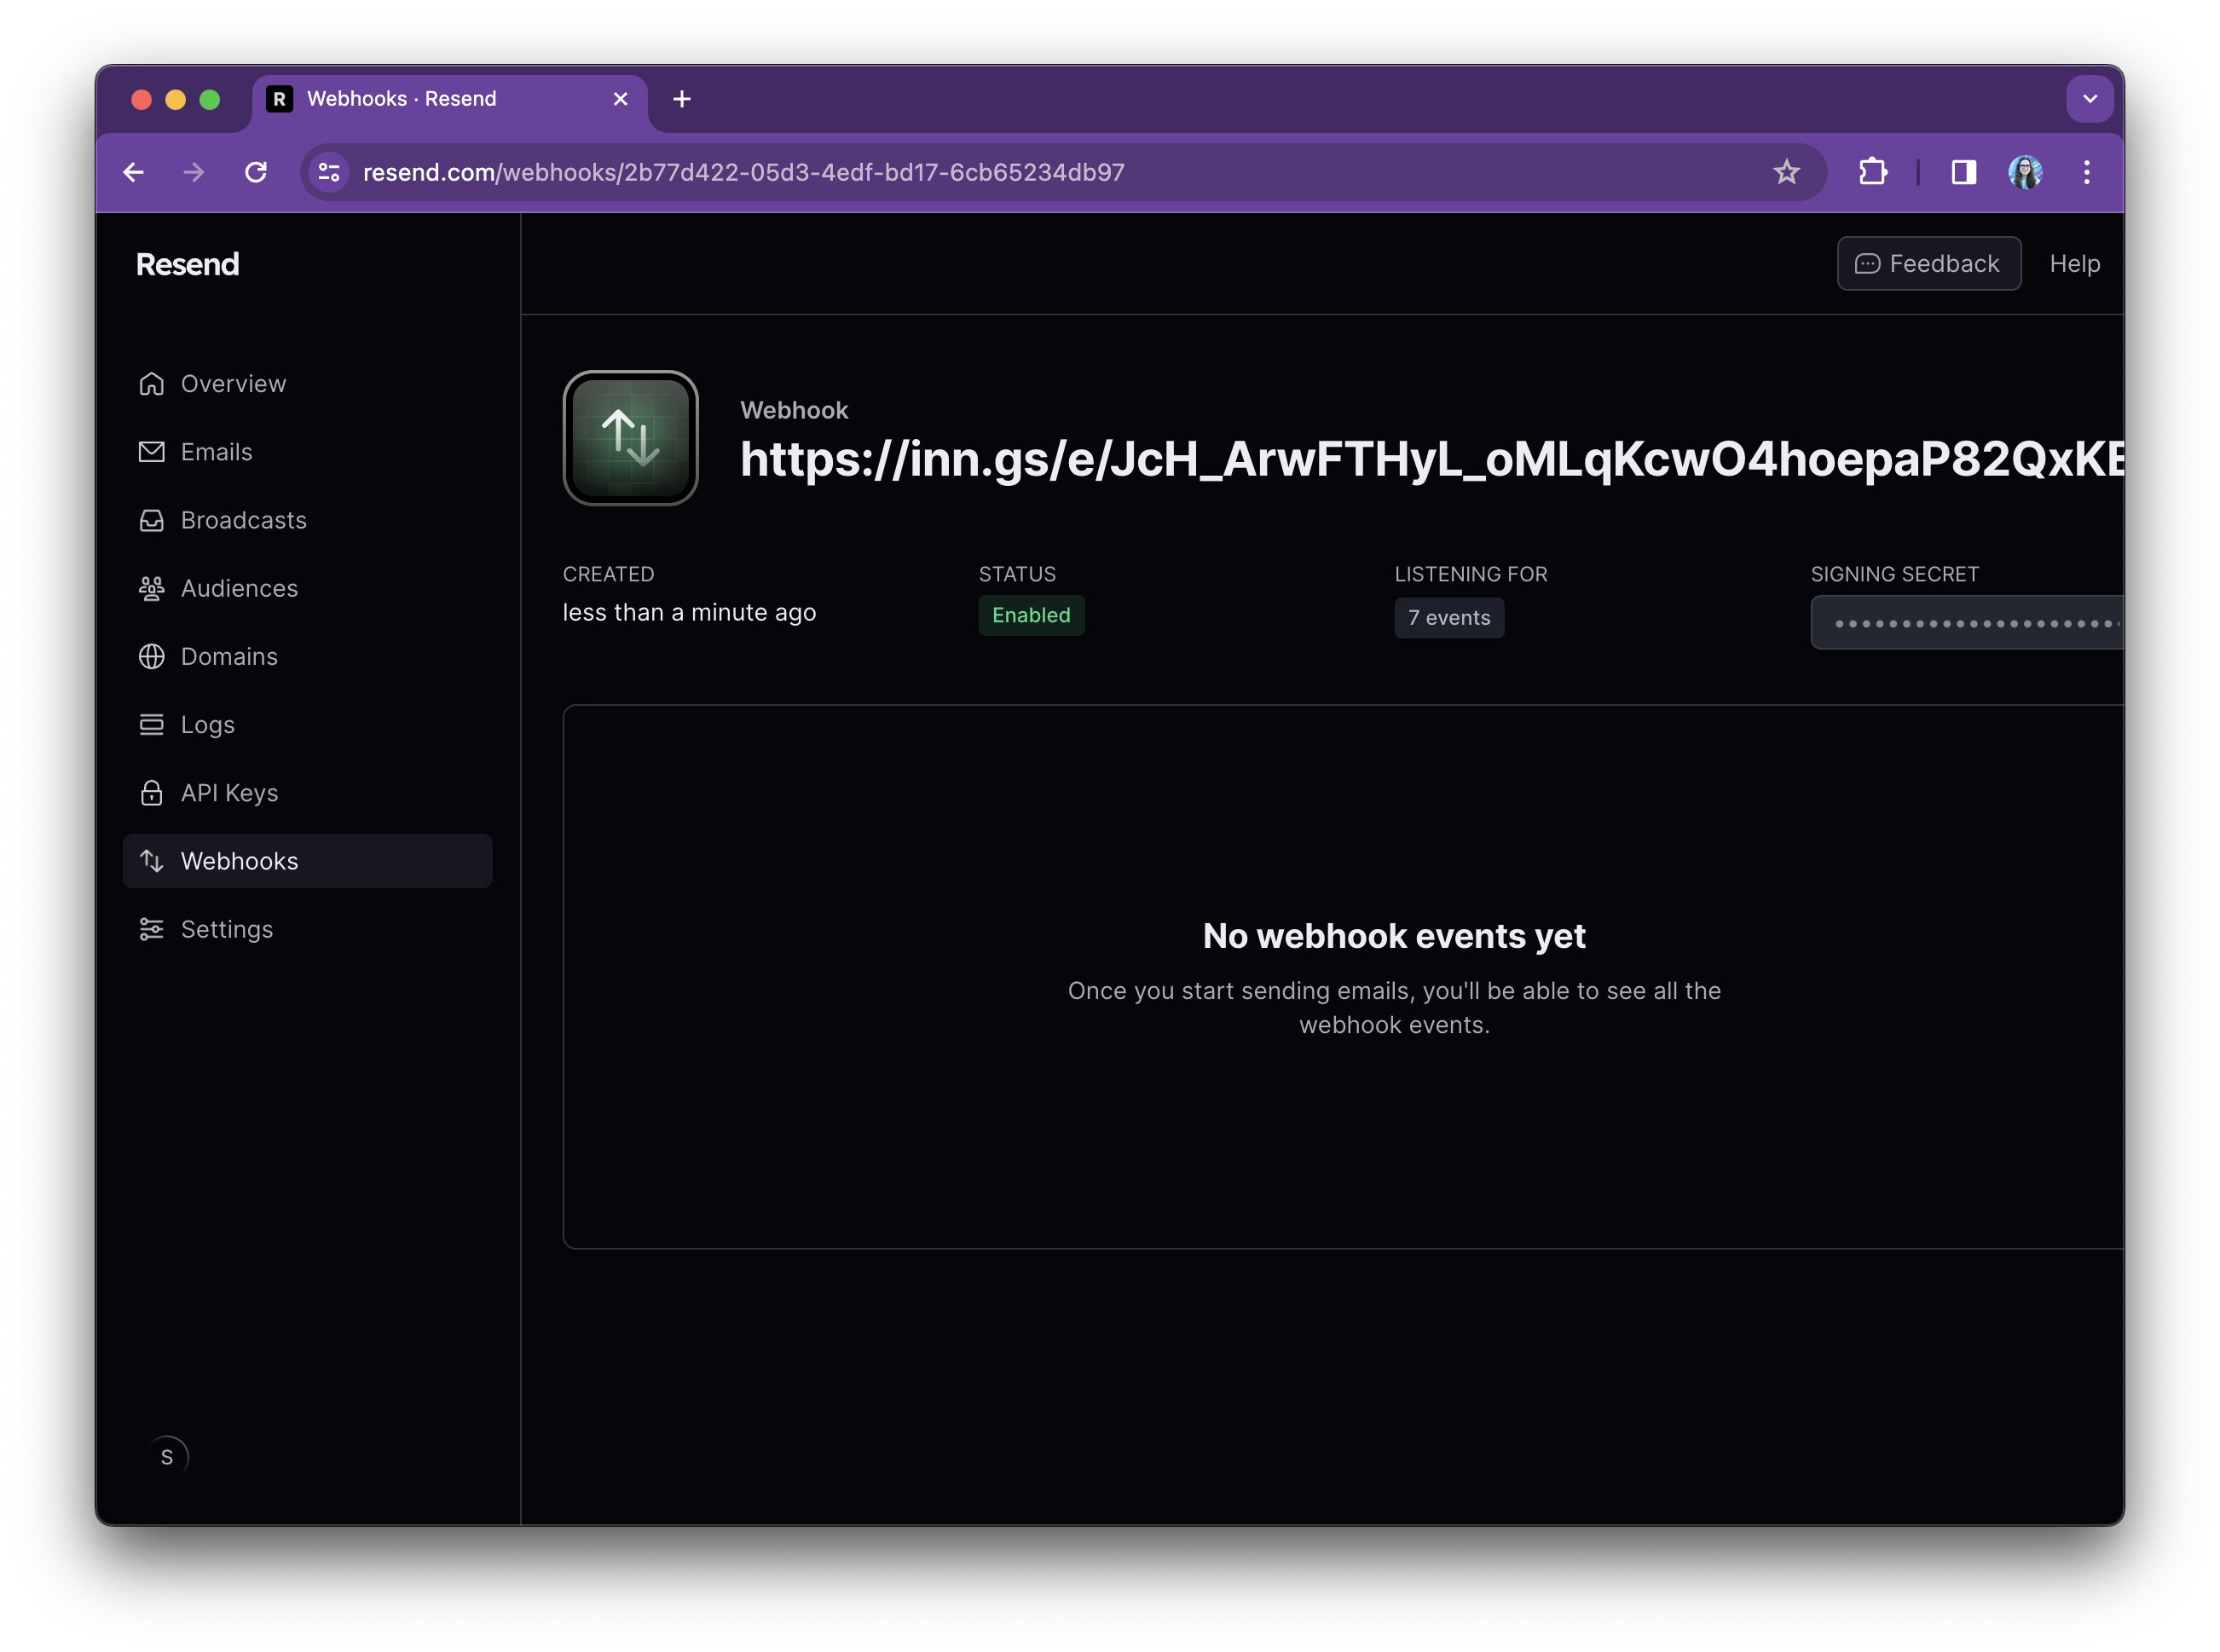
Your webhook will be created but there will be no webhook events yet.
- To see your webhook in action, send a test email and see the webhook events recorded:
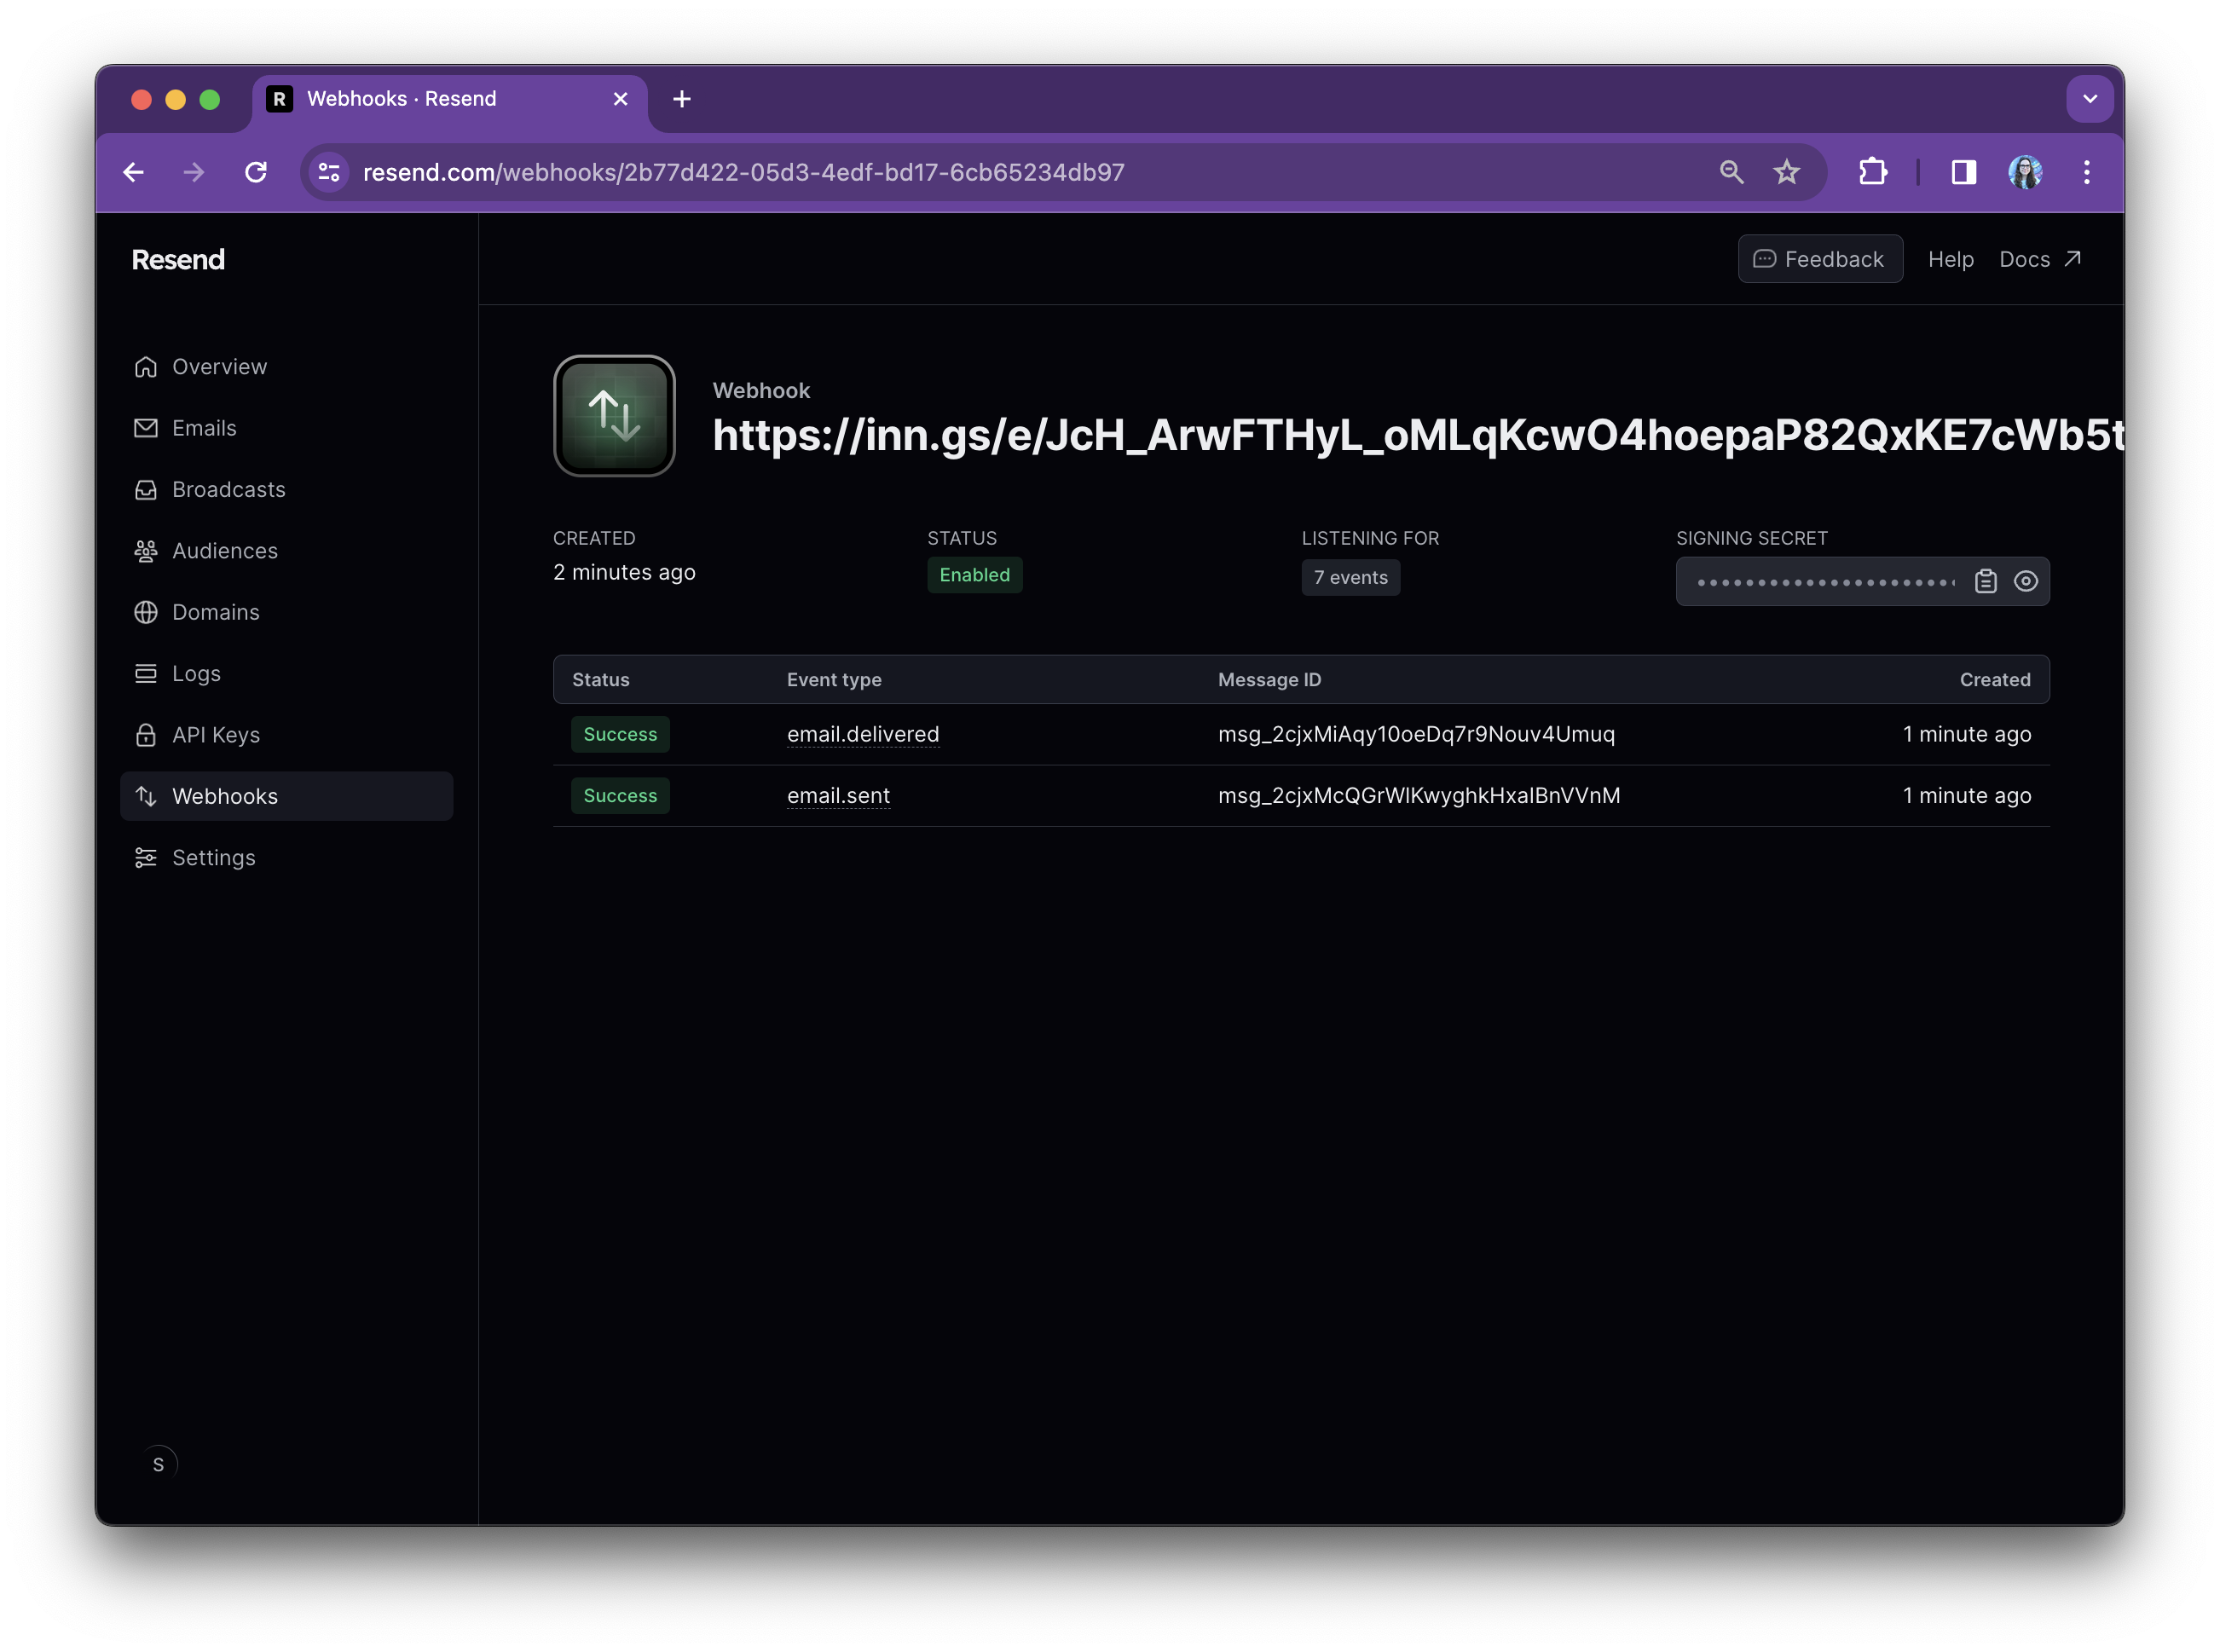
Your Resend webhook is set up 🥳
- Now check your Inngest dashboard to see the Events page in Inngest Cloud:
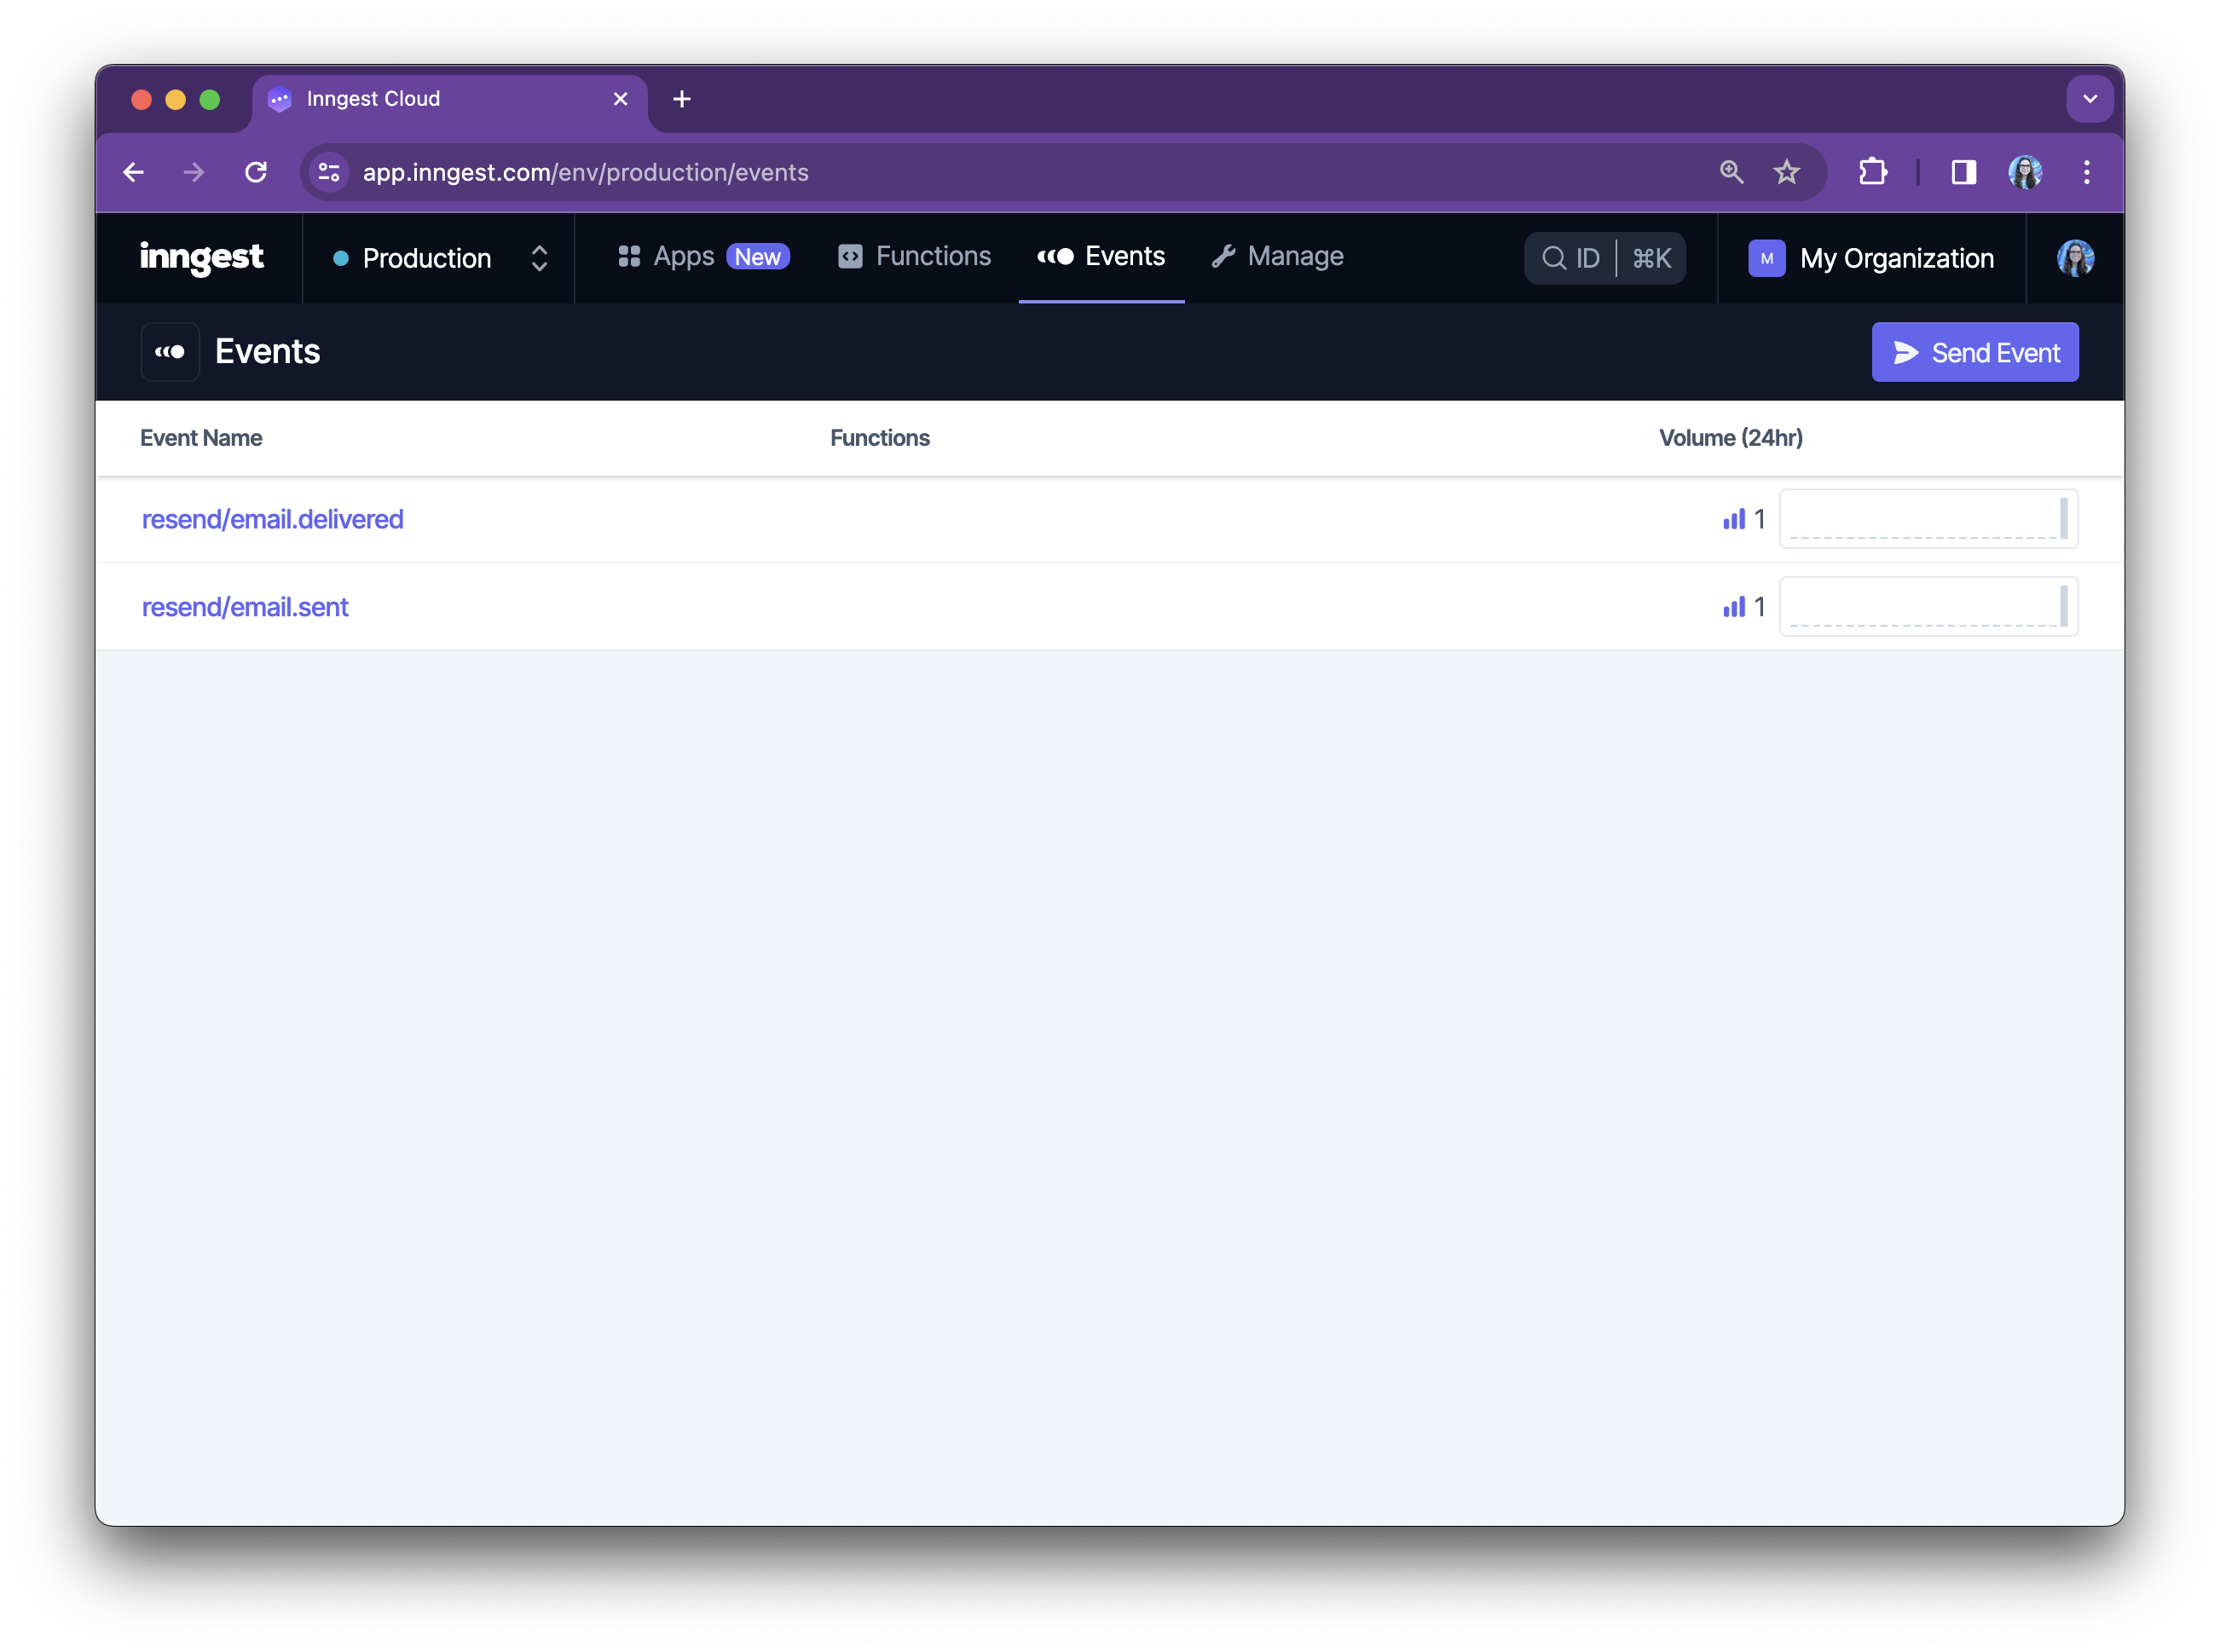
Congratulations! Now you have Resend events coming into Inngest. Next, you will use the Resend events you've received in Inngest to trigger functions in your application's codebase.
Writing your first Inngest function
Please note that this example assumes that you are using TypeScript and Next.js, and that you have already added Inngest to your project, but if you're using Inngest for the first time, you can follow the Quickstart guide to get it set up.
With Inngest set up in your codebase, you can write a function that is triggered every time a specific event arrives. For example, if an email sent to an user bounces, you can mark the user's email invalid in your database:
import db from "./database";

const invalidateUserEmail = inngest.createFunction(
  { id: 'invalidate-user-email' },
  { event: 'resend/email.bounced' },
  async ({ event }) => {
    const email = event.data.to[0];
    const user = await db.users.byEmail(email);
    if (user) {
      user.email_status = "invalid";
      await db.users.update(user);
    }
  }
)
Now that you've seen how to handle Resend events in your application, let's look at a more advanced example.
Creating a function to send email
Suppose that you want want to send user a welcome email when they sign up to your application.
First, create a helper function called sendEmail by adapting the example from the Resend Next.js Quickstart:
// resend.ts

import { Resend } from 'resend';

const resend = new Resend(process.env.RESEND_API_KEY);

export async function sendEmail(
  to: string,
  subject: string,
  content: React.ReactElement
) {
  const { data, error } = await resend.emails.send({
    from: 'Acme <noreply@acme.dev>',
    to: [to],
    subject,
    react: content
  });

  if (error) {
    throw error;
  }

	return data;
};
Now you're able to send emails! Let's put this new function to use.
The below example assumes that your application receives a app/signup.completed event when a new user signs up:
import { sendEmail } from "./resend";

const sendWelcomeEmail = inngest.createFunction(
  { id: 'send-welcome-email' },
  { event: 'app/signup.completed' },
  async ({ event }) => {
	  const { user } = event.data;
    await sendEmail(user.email, "Welcome to Acme", (
      <div>
        <h1>Welcome to ACME, {user.firstName}</h1>
      </div>
    ));
  }
)
Now that we've mastered the basics of sending email with Resend from an Inngest function, you can build even more complex functionality.
Sending a delayed follow-up email
Every Inngest function handler comes with an additional step object which provides tools to create more fine-grained functions. Using step.run allows you to encapsulate specific code that will be automatically retried ensuring that issues with one part of your function don't force the entire function to re-run. Additionally, other tools like step.sleep are available to extend your app's functionality.
The code below sends a welcome email, then uses step.sleep to wait for three days before sending another email offering a free trial:
const sendOnboardingEmails = inngest.createFunction(
  { id: 'onboarding-emails' },
  { event: 'app/signup.completed' },
  async ({ event, step }) => { // ← step is available in the handler's arguments
    const { user } = event.data
	  const { email, first_name } = user

    await step.run('welcome-email', async () => {
      await sendEmail(email, "Welcome to ACME", (
        <div>
          <h1>Welcome to ACME, {firstName}</h1>
        </div>
      ));
    })

   // wait 3 days before second email
   await step.sleep('wait-3-days', '3 days')

   await step.run('trial-offer-email', async () => {
     await sendEmail(email, "Free ACME Pro trial", (
        <div>
          <h1>Hello {firstName}, try our Pro features for 30 days for free</h1>
        </div>
      ));
    })
  }
)
This is handy, but we can do better. Since Resend sends you webhook events when emails are delivered, opened and clicked, you can build dynamic email campaigns tailored to each user's needs.
Creating a dynamic drip campaign
Let's say you want to create the following campaign:
- Send every user a welcome email when they join.
- If a
resend/email.clickedevent is received (meaning the user has engaged with your email), wait a day and then follow-up with pro user tips meant for highly engaged users. - Otherwise, wait for up to 3 days and then send them the default trial offer, but only if the user hasn't already upgraded their plan in the meantime.
const signupDripCampaign = inngest.createFunction(
  { id: "signup-drip-campaign" },
  { event: "app/signup.completed" },
  async ({ event, step }) => {
    const { user } = event.data;
    const { email, first_name } = user
    const welcome = "Welcome to ACME";

    const { id: emailId } = await step.run("welcome-email", async () => {
      return await sendEmail(
        email,
        welcome,
        <div>
          <h1>Welcome to ACME, {user.firstName}</h1>
        </div>
      );
    });

    // Wait up to 3 days for the user open the email and click any link in it
    const clickEvent = await step.waitForEvent("wait-for-engagement", {
      event: "resend/email.clicked",
			if: `async.data.email_id == ${emailId}`,
      timeout: "3 days",
    });

    // if the user clicked the email, send them power user tips
    if (clickEvent) {
      await step.sleep("delay-power-tips-email", "1 day");
      await step.run("send-power-user-tips", async () => {
        await sendEmail(
          email,
          "Supercharge your ACME experience",
          <h1>
            Hello {firstName}, here are tips to get the most out of ACME
          </h1>
        );
      });

      // wait one more day before sending the trial offer
      await step.sleep("delay-trial-email", "1 day");
    }

    // check that the user is not already on the pro plan
    const dbUser = db.users.byEmail(email);

    if (dbUser.plan !== "pro") {
      // send them a free trial offer
      await step.run("trial-offer-email", async () => {
        await sendEmail(
          email,
          "Free ACME Pro trial",
          <h1>
            Hello {firstName}, try our Pro features for 30 days for free
          </h1>
        );
      });
    }
  }
);
Voilà! You've created a dynamic marketing drip campaign where subsequent emails are informed by your user's behavior.
Testing webhook events using the Inngest Dev Server
During local development with Inngest, you can use the Inngest Dev Server to run and test your functions on your own machine. To start the server, in your project directory run the following command:
npx inngest-cli@latest dev
In your browser open http://localhost:8288 to see the development UI.
To forward and quickly test events from Inngest Cloud to your Dev Server, head over to Inngest Cloud. Choose Events tab from the nav bar. Select any individual event, choose Logs from the sidebar, and then select the Send to Dev Server.
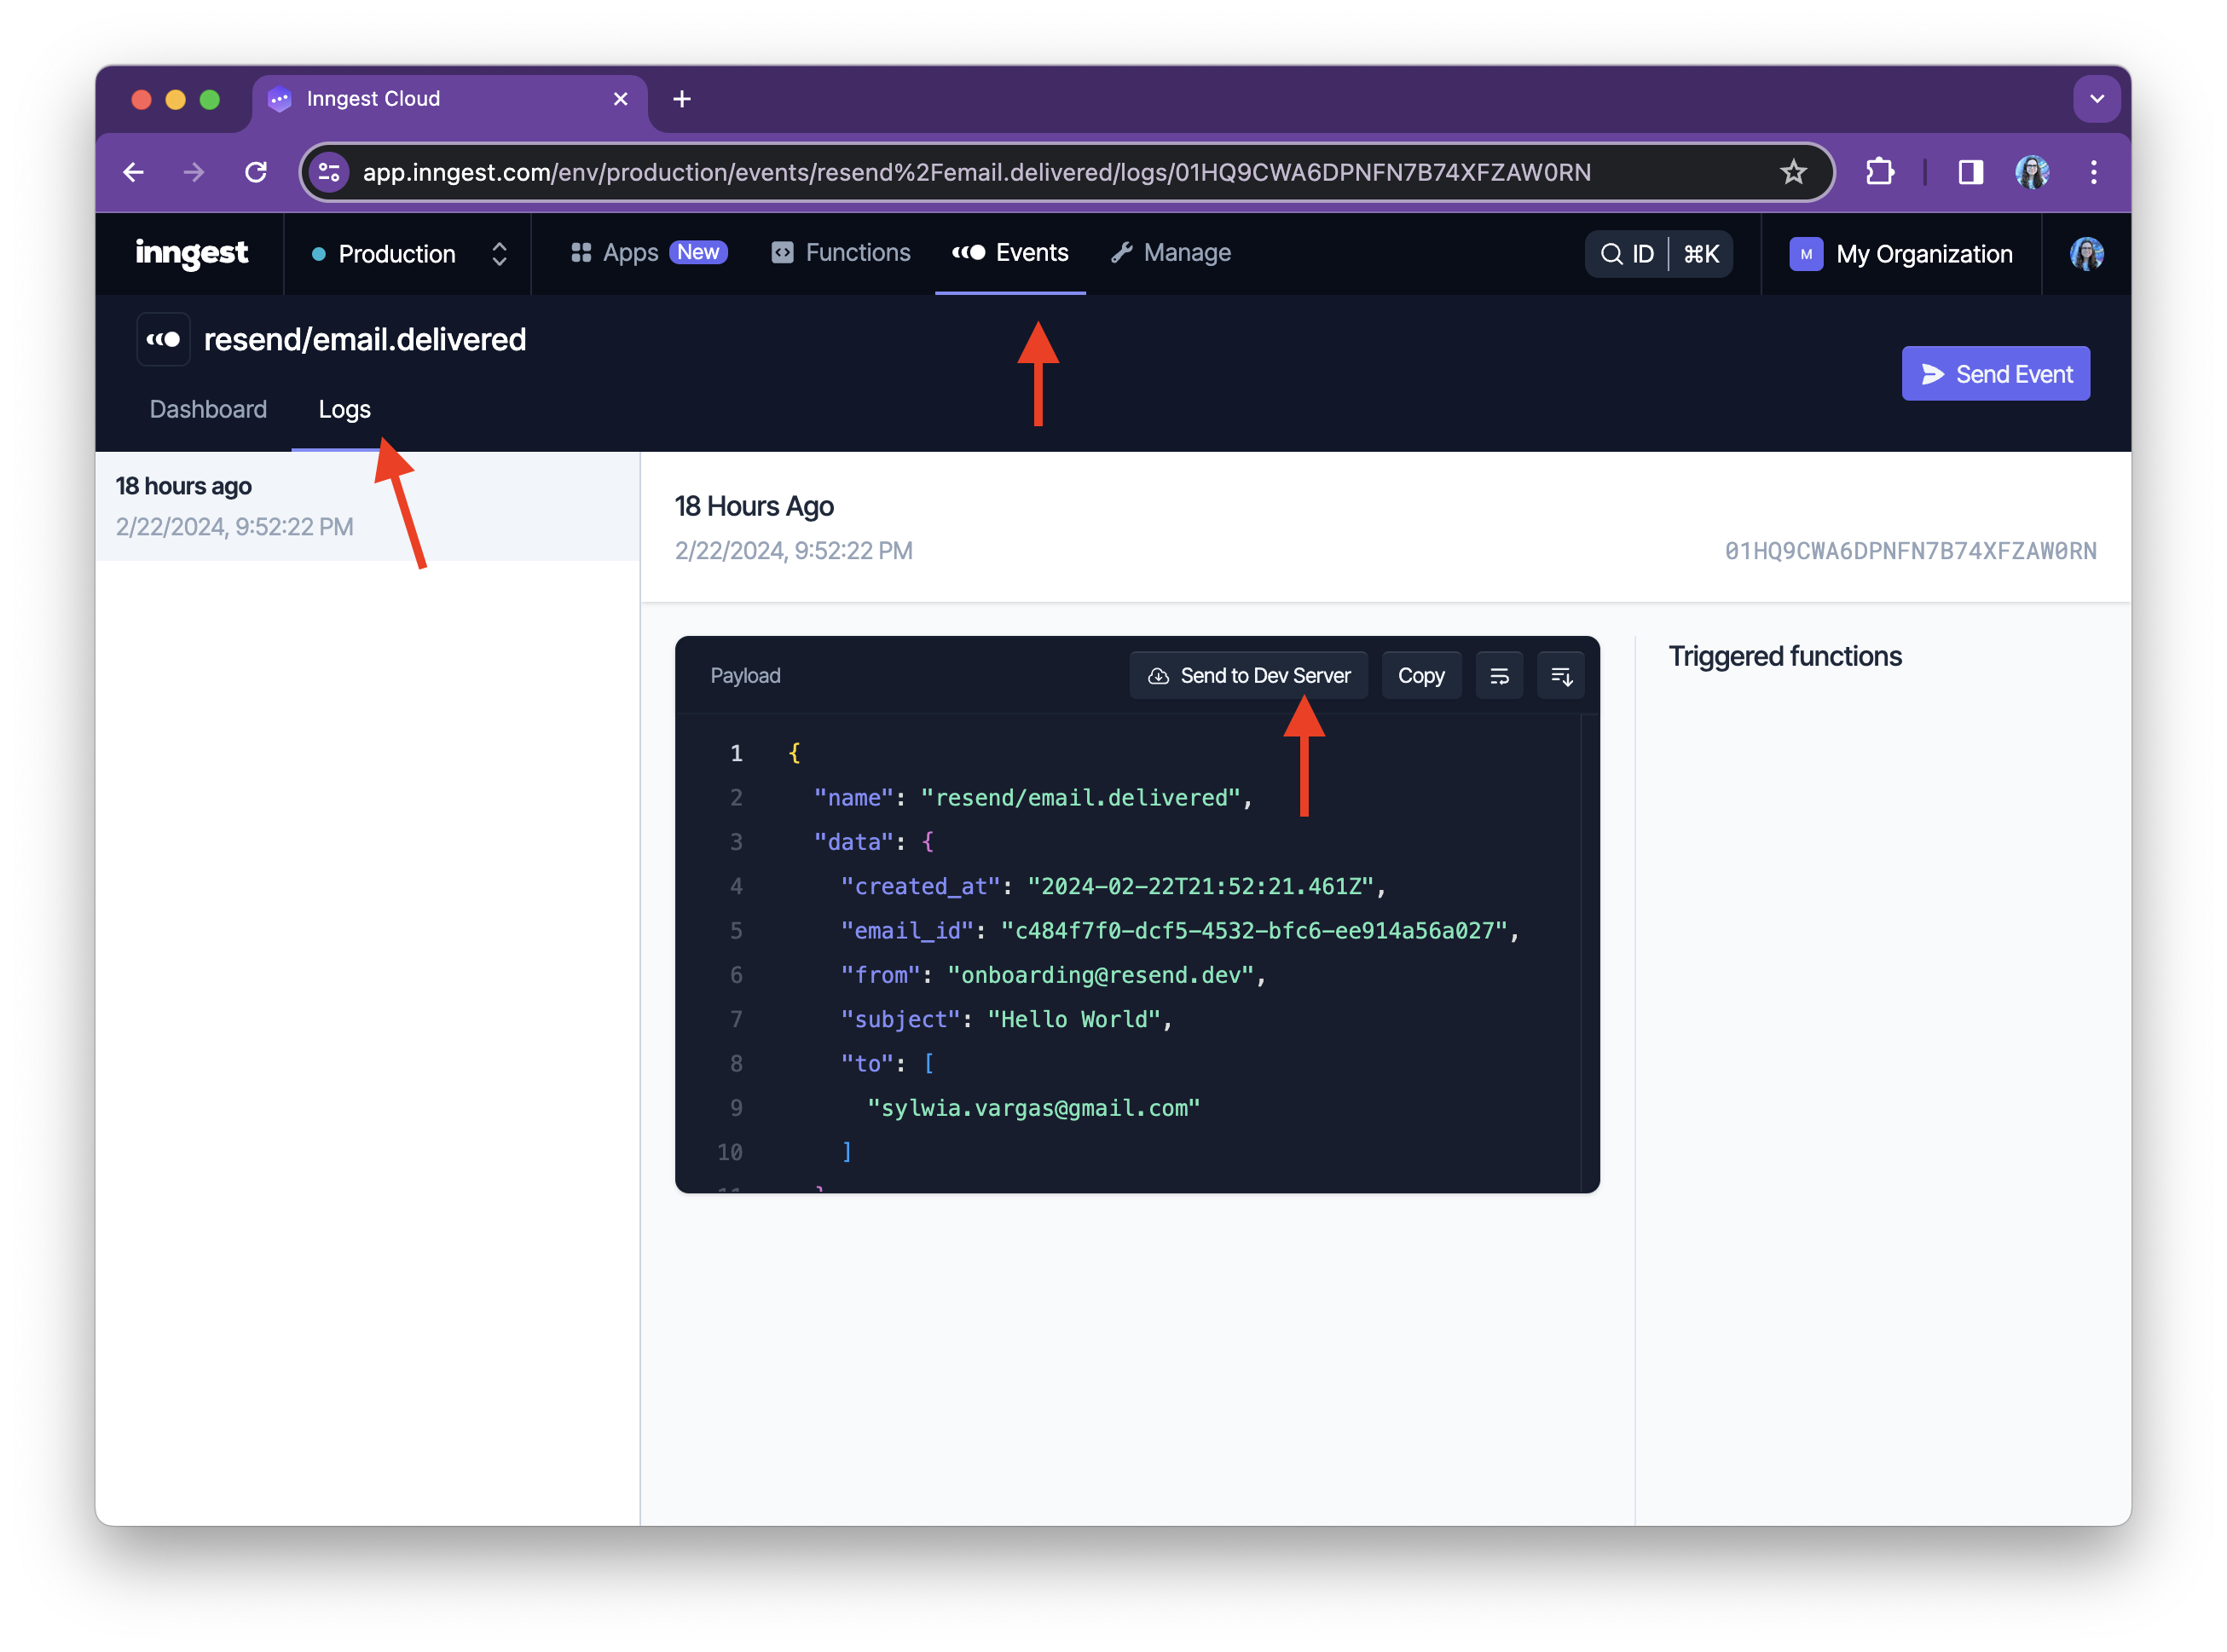
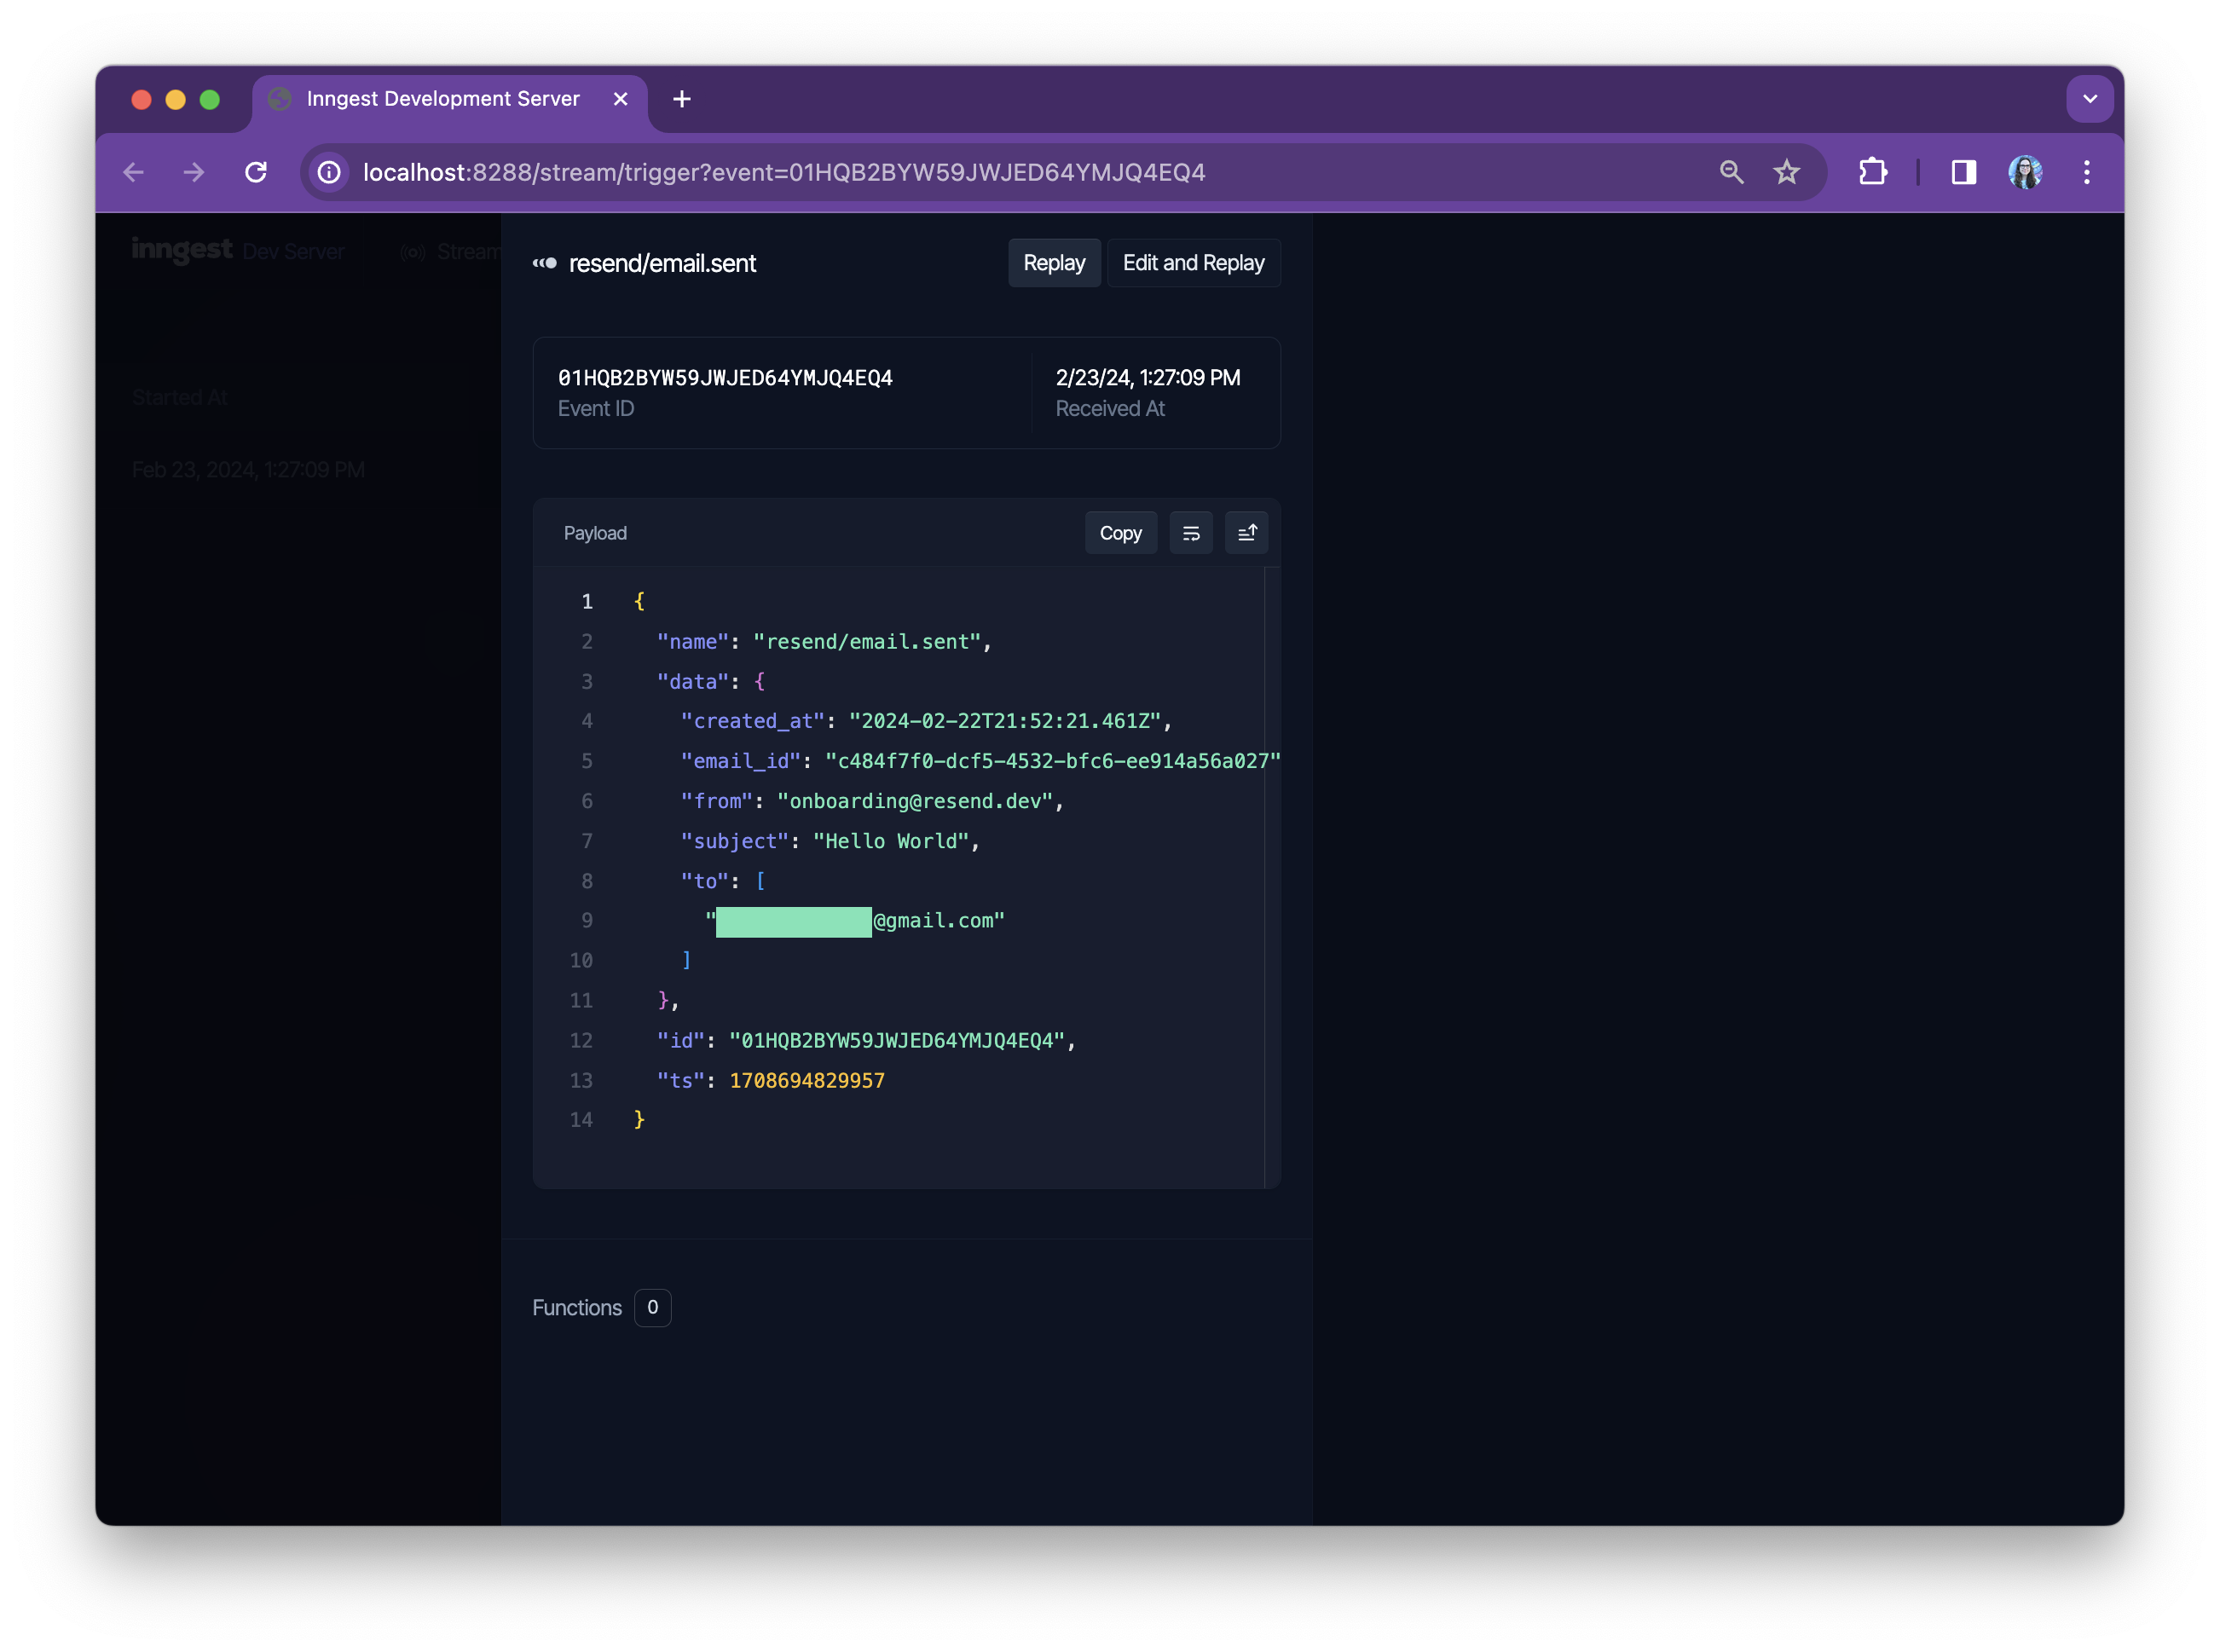
You'll now see the event in the Inngest Dev Server's Stream tab alongside any functions that it triggered.
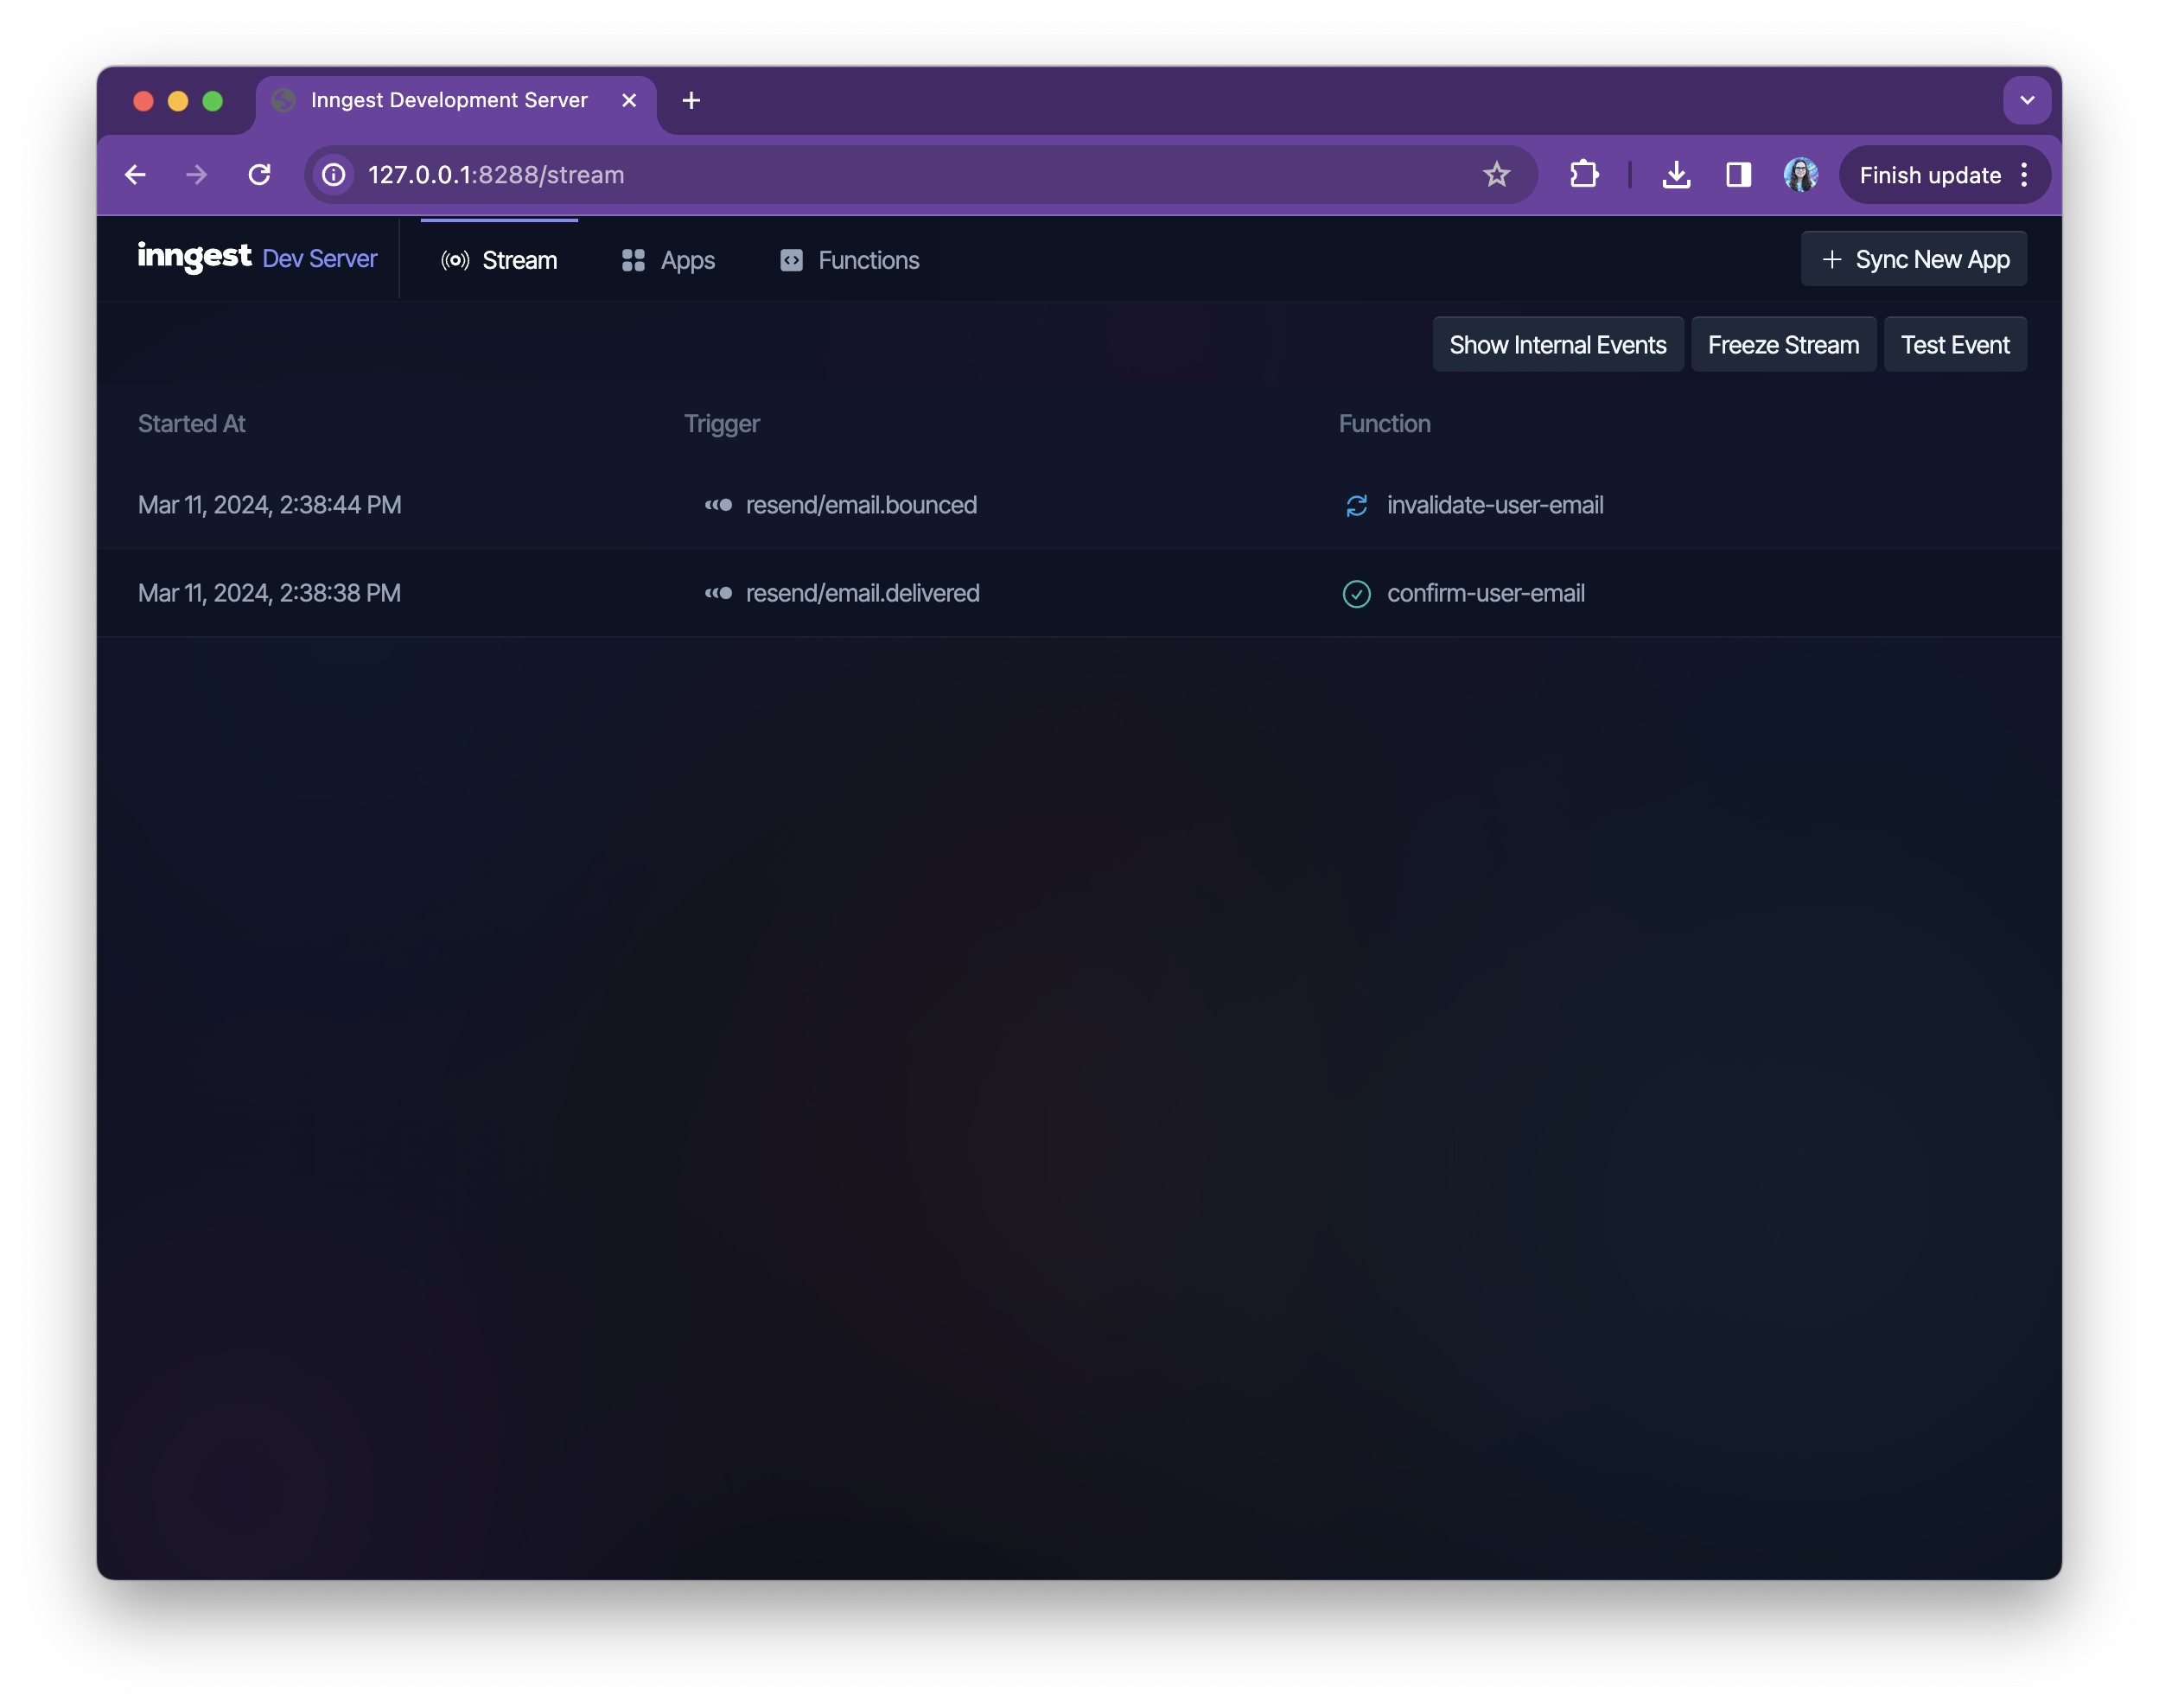
From here you can select the event, replay it to re-run any functions or edit and replay to edit the event payload to test different types of events.
Conclusion
Congratulations! You've now learned how to use Inngest to create functions that use Resend webhook events.